Did you know mortise-and-tenon joints have been used for over 4,000 years? These methods are not just durable. They also make handcrafted woodworking projects both useful and lovely. In this guide, we’ll explore woodworking without power tools, focusing on the beauty of hand joinery.
Traditional woodworking methods help you make strong connections without nails or screws. This approach lets you improve your skills and enjoy the art of making things by hand. Let’s start learning the basics of joinery together. For more details, check out this comprehensive guide to wood joinery.
Understanding Woodworking Without Power Tools
Woodworking without power tools opens a world of creativity and skill. It lets you connect deeply with materials. Traditional methods not only improve your skills but also highlight the beauty of each piece’s imperfections.
Your journey into this craft can deepen your appreciation for it.
The Beauty of Handcrafted Projects
Handcrafted woodworking projects have a special charm. Each piece reflects your skills and personality. The natural wood variations make each item unique.
These items have a warmth and authenticity that mass-produced goods lack.
Benefits of Using Traditional Methods
Traditional woodworking methods have many benefits. They help you understand the craft better and improve your skills. Working with hand tools is a tactile experience that promotes mindfulness.
By creating, you make functional items and help the environment. This approach reduces your carbon footprint.
| Benefits | Description |
|---|---|
| Skill Development | Improves your proficiency with hand tools. |
| Mindfulness | Encourages a focused and tranquil approach to crafting. |
| Sustainability | Reduces dependency on electric tools, lowering your carbon footprint. |
| Unique Creations | Each project reflects individuality and personal touch. |
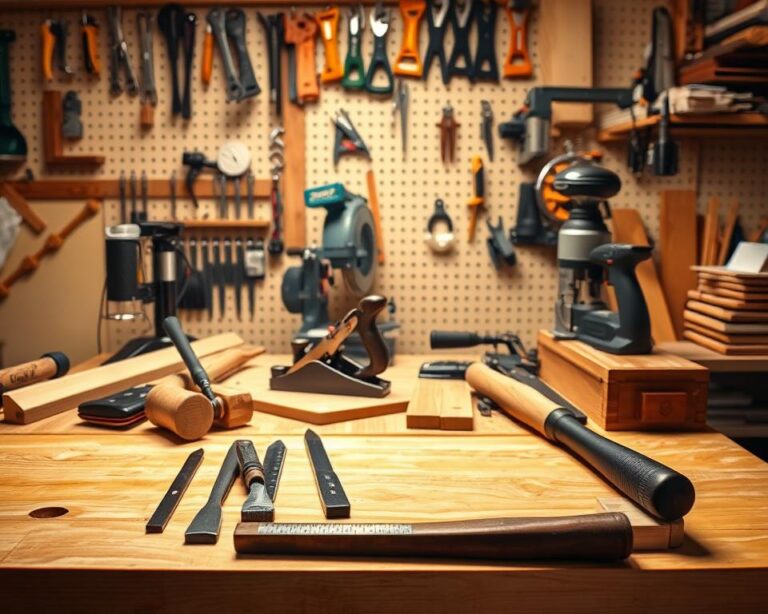
Essential Hand Tools for Joinery
Starting your woodworking journey means you need the right tools. Each tool plays a special role in joinery, helping you make beautiful projects. Quality woodworking hand tools make your work better and more fun.
Must-Have Tools for Beginners
Beginners should get a set of essential wood hand tools. Here are the must-haves:
- Japanese hand saw – Great for both rip and crosscuts.
- Marking knife – Key for precise measurements.
- Layout square – Keeps your cuts accurate.
- Chisel set – Essential for shaping joints and edges.
- Block plane – Smooths surfaces.
- Clamps – Hold pieces together while working.
- Sandpaper – Helps achieve a smooth finish.
- Tape measure – Crucial for accurate measurements.
Caring for Your Tools
Proper care of your tools is key to their longevity and performance. Here’s how to keep them in top shape:
- Sharpen blades regularly for clean cuts.
- Store tools in a dry place to prevent rust.
- Use protective sprays or oils to stop rust.
- Apply linseed oil to wooden handles for durability.
Types of Joinery Techniques to Explore
Woodworking lets you dive into many joinery techniques. Basic woodworking joints are key for solid and good-looking projects. Here are three main techniques to boost your skills and finish amazing projects.
Butt Joints
Butt joints are simple and a common choice in woodworking. They involve aligning two pieces of wood side by side. You need just a few tools and glue to make them stronger.
But without glue, butt joints are the weakest. So, use them carefully in your projects.
Dado Joints
Dado joints are great for strength, especially in shelving. You cut a groove in one wood piece for the other to fit in. This makes the connection strong and looks good too.
Mortise and Tenon Joints
Mortise and tenon joints are known for their strength and reliability. They fit a tenon into a mortise, making a very strong bond. This joint is perfect for furniture that needs to last, like chairs and tables.
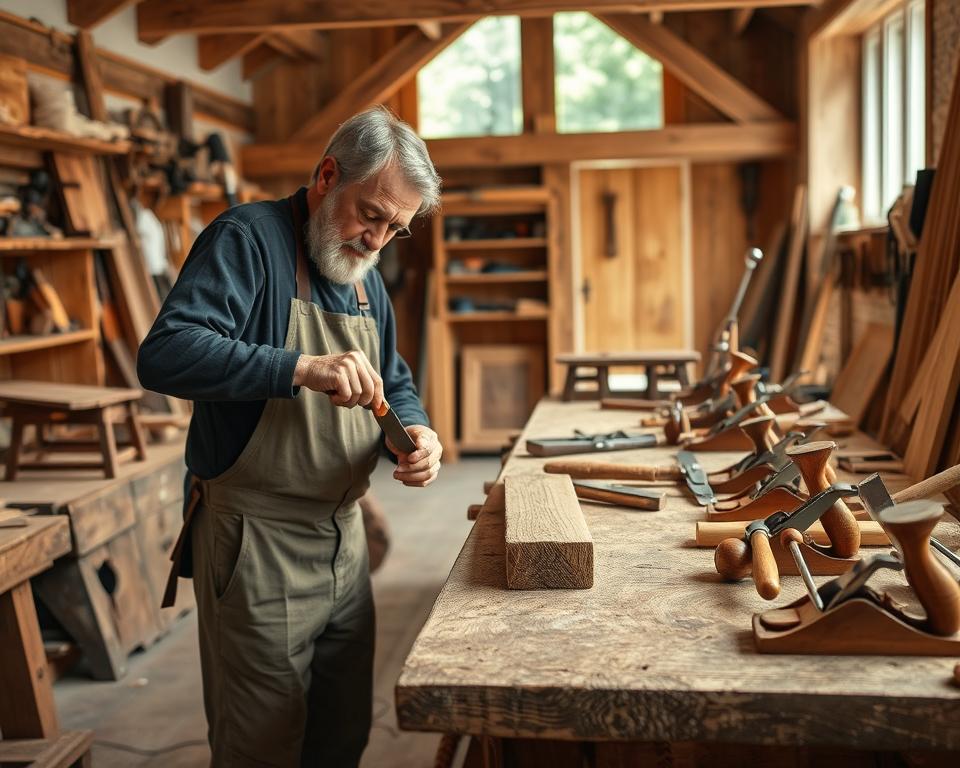
Preparing Your Wood
Getting your wood ready is key in woodworking without power tools. Choosing the right wood and measuring accurately are crucial. The right wood can make your project look good and last long. Here, you’ll learn how to pick the best wood and measure it right.
Choosing the Right Wood Species
Choosing wood is important for your project. Hardwoods like oak and maple are strong and beautiful. Softwoods, such as pine or poplar, are easier for beginners.
Think about the wood’s look, grain, and how it works with tools. Different woods have different weights, densities, and ease of use. This affects how well you can work with them.
Measuring and Marking Techniques
Measuring accurately is both basic and freeing in woodworking without power tools. Use measuring tapes and squares for precise lines. A marking knife helps mark where to cut, reducing mistakes.
These methods improve your precision, leading to better results and less waste. This makes all your hard work worth it.

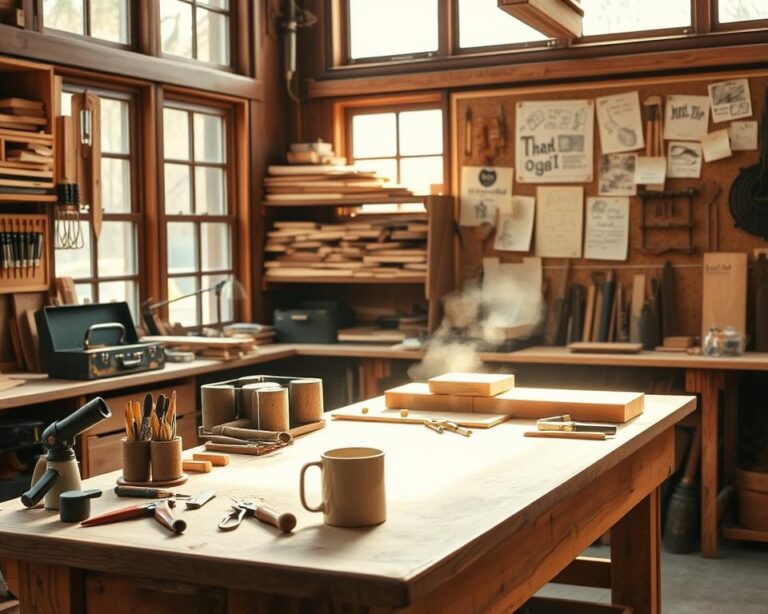
Setting Up Your Workspace
Creating a productive woodshop is key for any woodworking project. A well-organized workspace helps you work faster and safer. Keep your area clean and organized, so you can find tools easily and avoid distractions.
Creating an Efficient Environment
To make your workspace efficient, consider these points:
- Adequate Lighting: Make sure your area is well-lit to prevent eye strain and improve accuracy.
- Tool Storage: Use pegboards or toolboxes to keep tools organized and within reach.
- Sturdy Workbench: A solid workbench is essential for your projects, offering a stable surface for tasks.
- Clear Pathways: Set up your tools and equipment to avoid clutter and ensure safe paths.
Safety Tips for Hand Tool Use
When using hand tools, safety comes first. Here are some important tips:
- Cut Away from Your Body: Always cut away from yourself to lower injury risk.
- Wear Protective Gear: Use safety glasses and gloves to protect yourself while working.
- Stay Focused: Keep your attention on the task to avoid accidents caused by distractions.
- Maintain a Clear Workspace: Clear your area of unnecessary items to reduce hazards.
Step-by-Step Guide to Making a Basic Joint
Start by planning your woodworking project carefully. Sketch your design, note the dimensions, and list materials needed. Knowing each joinery technique is key for a solid foundation.
Planning Your Project
A good plan helps you work efficiently. Visualize your project in stages. Knowing which joints you’ll use helps choose tools and materials, making your project better.
Cutting the Wood
Accurate cutting is crucial in woodworking. Hand saws, like Japanese saws, help make precise cuts. Double-check your measurements to ensure pieces fit right.
Assembling the Joint
Follow your plan closely when assembling joints. Use clamps to hold pieces in place and apply wood glue for extra strength. Wait for the glue to dry before moving on.

For more on joinery, check out this detailed guide. Paying close attention at each step will greatly improve your woodworking project.
Finishing Techniques for Your Projects
To get a professional look in your woodworking, focus on finishing techniques. Proper surface prep is key for a great finish and durability. Start by making sure your wood is ready for the final touches.
Sanding and Preparing Surfaces
Sanding is crucial for a smooth wood surface. Use coarse grit sandpaper first to remove rough spots. Then, move to finer grits for a silky finish.
This not only gets the wood ready but also makes it look clean and polished. Good surface prep is essential for the best results.
Applying Natural Finishes
Natural wood finishes bring out the wood’s beauty and protect it. Tung oil and linseed oil are great choices. They add moisture protection and enhance the wood’s look.
Apply thin coats and let them dry fully between layers. This careful process protects the wood and highlights its natural beauty.
| Finish Type | Benefits | Application Method |
|---|---|---|
| Tung Oil | Water-resistant, enhances grain | Apply with a cloth, let sit, then wipe |
| Linseed Oil | Non-toxic, traditional finish | Brush on, allow to soak, wipe excess |
| Beeswax | Natural luster, easy to apply | Rub on with cloth after other finishes |
Mastering these finishing techniques can make your woodworking projects stand out. Focus on surface prep and choose the right natural finishes. This will not only improve the look but also the durability of your work.
Tips for Maintaining Your Wooden Projects
Keeping your wooden projects in good shape is key to their longevity. Proper care ensures they stay functional and beautiful for years. Simple practices can help maintain your projects’ quality and beauty.
Proper Storage Solutions
Storing wooden projects right is important to avoid damage. Here are some tips for the best storage:
- Keep wooden items in a cool, dry spot to keep them in good condition.
- Use felt pads or coasters under items to prevent scratches and moisture damage.
- Don’t put items near heat sources or direct sunlight, as it can cause fading and warping.
Regular Maintenance Practices
Regular upkeep keeps your projects looking great. Follow these tips to make them last longer:
- Dust surfaces with a soft cloth to remove dirt and avoid scratches.
- Apply oils or wax as needed to protect the wood.
- Check for wear or damage and fix any issues quickly to extend their life.
- Adjust to climate changes, especially when storing, as moisture can harm your items.
Common Mistakes to Avoid in Hand Joinery
Hand joinery is rewarding but comes with challenges. You might face common woodworking mistakes that slow you down. Knowing and avoiding these issues will improve your skills and project quality.
Miscalculating Measurements
Miscalculating dimensions is a common problem. It can cause joints that don’t fit, waste materials, and frustration. To avoid this, always double-check your measurements before cutting. This ensures your project starts on a solid foundation.
Rushing Through the Process
Rushing can lower your work’s quality. Hurrying might lead to missing details or making mistakes. Take your time and plan each step carefully. This patience will help you create something durable and beautiful.
Inspiring Project Ideas for Beginners
Starting your woodworking journey? Try beginner woodworking projects to improve your skills. Begin with simple furniture like a stool or small shelf. These projects teach you basic joinery and get you used to tools.
As you finish each project, your confidence will grow. This will help you tackle more challenging projects later.
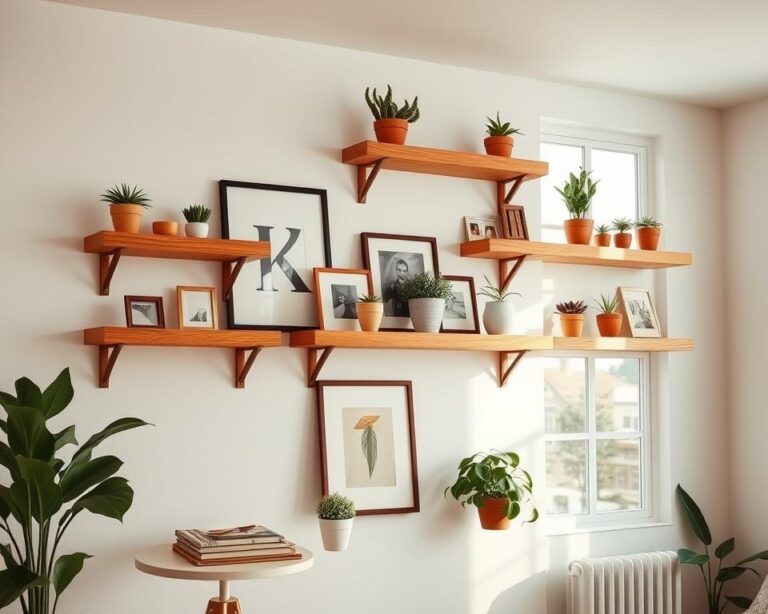
Simple Furniture Projects
Making simple furniture is rewarding and builds your skills. You can make a cozy stool or a stylish shelf. These projects teach you to measure and cut accurately.
They also add useful items to your home.
Fun Decorative Items to Make
Try making decorative items to enhance your home. Projects like picture frames or wooden toys improve your joinery. They also make great gifts.
Each project shows your progress and adds a personal touch to your space.