Did you know that over 14 million Americans enjoy woodworking as a hobby? This hobby brings joy and satisfaction to many. If you’re new to woodworking, you’re in the right spot. This article is for you, whether you’re a complete beginner or just looking for simple ideas.
Through DIY woodwork tutorials, you’ll learn to make useful and lovely items. These items will make your home better and improve your DIY skills.
Woodworking is more than just making things; it’s a journey of growth and fulfillment. You’ll find ten exciting projects here to start your woodworking adventure.
Why Woodworking is Great for Beginners
Woodworking is a rewarding hobby for beginners. It helps you grow personally and boosts your creativity. Learning about woodworking’s benefits can inspire you to start this enjoyable hobby.
Benefits of Woodworking for Skills Development
Woodworking teaches you important skills. You get better at using tools and solving problems. It’s a great way for beginners to build a strong foundation.
Many DIY tutorials make learning fun. They teach you practical skills that are easy to follow.
Cost-Effective Creativity
Woodworking lets you create things without spending a lot. You can make furniture and decorations that match your style. By using woodworking tips, you can make the most of your materials and save money.
Building Confidence Through Craftsmanship
Completing woodworking projects is very satisfying. As you finish more projects, you become more confident. Celebrating your achievements is rewarding.
Each project you finish shows off your creativity and skills. It’s a great way to see how far you’ve come.
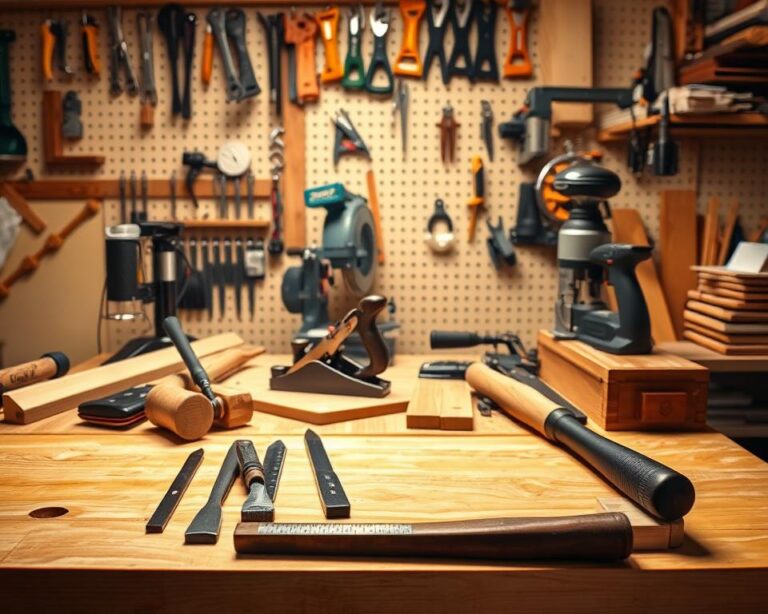
Essential Tools for Your Easy Woodworking Projects
Before starting any woodworking project, having the right tools is key. A good toolkit is the base for success in many woodworking projects. Knowing which tools to buy lets you start woodworking projects with confidence and creativity.
Must-Have Hand Tools
Your toolbox should start with essential hand tools for precision and control. Key items include:
- Handsaw: Perfect for making straight cuts in wood.
- Chisel Set: Useful for carving and shaping wood.
- Measuring Tape: Ensures accuracy when cutting and assembling materials.
- Square: Helps in creating perfect right angles.
Useful Power Tools for Beginners
As you get more confident, add power tools to your toolkit. These tools make projects easier and improve your woodworking guides:
- Drill: Ideal for making holes and driving screws.
- Jigsaw: Offers the ability to cut curves or intricate shapes.
- Orbital Sander: Provides a smooth finish on your projects.
Safety Equipment You Shouldn’t Ignore
Keeping safety in mind while working is crucial. Essential safety equipment includes:
- Safety Goggles: Protects your eyes from debris.
- Gloves: Shields your hands from splinters and cuts.
- Dust Mask: Prevents inhalation of harmful dust particles.
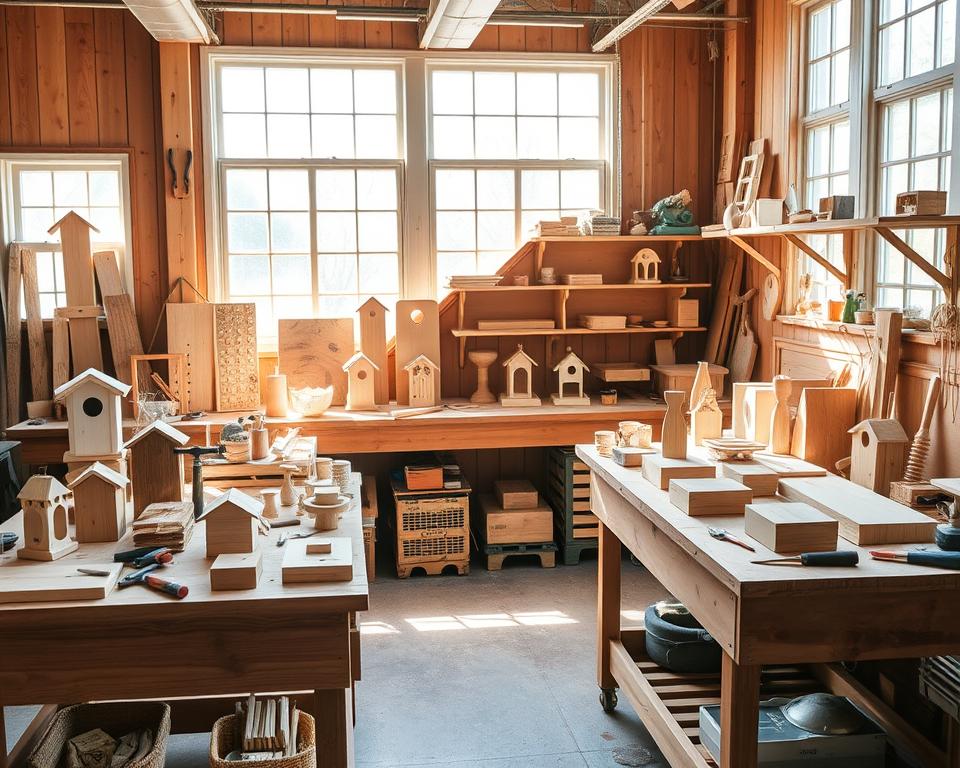
Simple DIY Birdhouse: A Perfect Starter Project
Building a birdhouse is a great way to start woodworking. It combines creativity with a useful project. You can use simple plans to make a cute birdhouse for your garden.
Materials Needed for Your Birdhouse
To start this project, you’ll need:
- Untreated wood (like pine or cedar)
- Nails or screws
- Exterior-grade wood glue
- Sandpaper
- Paint or wood stain (optional)
Step-by-Step Instructions
Here’s how to build your birdhouse:
- Cut the wood pieces as your design shows.
- Use nails and glue to put together the walls, base, and roof.
- Sand any rough spots for a smooth finish.
- Paint or stain it if you want.
- Let it dry fully before putting it outside.
Customization Ideas to Make It Your Own
Make your birdhouse special with these ideas:
- Try unique shapes or designs for the roof and entrance.
- Use bright colors or patterns with paint.
- Add hooks or perches for extra use.
This project is rewarding and lets you be creative. Use simple plans and watch your garden come alive with birds.
Fun and Functional Plant Stand Project
Building a plant stand is great for both looks and function in your home. It’s perfect for those who want to improve their space and hone their woodworking skills. We’ll look at picking the right wood, following simple assembly steps, and adding a personal touch with paint or stain.
Choosing the Right Wood Type
Choosing the right wood is key for both strength and looks. Here are some popular options:
- Pine: Ideal for beginners because it’s light and easy to work with.
- Birch: Strong and smooth, great for a clean finish.
- Oak: Sturdy and adds a rustic touch, but can be harder to work with.
Easy Assembly Instructions
Assembling your plant stand is simple. Just follow these steps for a great result:
- Cut the wood to the size you want. Double-check your measurements.
- Drill holes before assembling to avoid splitting the wood.
- Use wood screws to hold it together, making sure it’s aligned.
Tips for Painting or Staining Your Stand
Finish your stand with paint or stain that matches your home. Here are some tips:
- Choose water-based paint for easy clean-up and quick drying.
- Use a wood conditioner before staining for an even coat.
- Apply a sealant to protect against moisture and extend its life.
Create Your Own Wooden Coasters
Making wooden coasters is a rewarding project for beginners. They are both practical and a way to show your creativity. Follow these tips to make your coasters beautiful.
Selecting Materials and Designs
Choose materials that fit your style and budget. Reclaimed wood gives a rustic look, while softwoods like pine are easy to work with. Aim for 4×4 inch squares for standard coasters. Pick designs that match your home’s decor. Simple shapes or natural finishes work well.
Quick Assembly Techniques
Start with basic assembly. Measure and mark your wood before cutting. Use a handsaw or jigsaw to cut your squares. Sand the edges to smooth them out and avoid splinters. This easy process leads to great results quickly.
Personalization Options for Coasters
Once you have the basic shape, think about adding personal touches. Engraving names or designs makes them unique. Painting or staining lets you play with colors. You can even use stencils for more detailed patterns. These details make your coasters special and show off your style.
Build a Basic Bookshelf from Scratch
A basic bookshelf is a great project for beginners in woodworking. It’s both useful and lets you show off your creativity. First, plan your bookshelf design carefully. Think about its size and style to match your space. This planning is key, and many online woodworking guides can help.
Planning Your Bookshelf Design
Consider the size of items you’ll store and how many shelves you need. Sketch a design that’s both functional and stylish. Adding your personal touch will make your bookshelf unique among other woodworking projects.
Tools and Materials Needed
You’ll need some basic tools and materials to start. Get plywood or hardwood, a power saw, drill, and clamps. Wood glue and screws are also essential for putting it together. Check out simple woodworking plans for exact measurements to ensure your bookshelf is strong and well-made.
Simple Assembly Steps
Start by cutting the materials to the right sizes for your design. Use brackets to attach the shelves for extra support. Sand the edges for a smooth finish, which will improve your project’s look. For more ideas, look at this guide for making wooden items: woodworking tips.

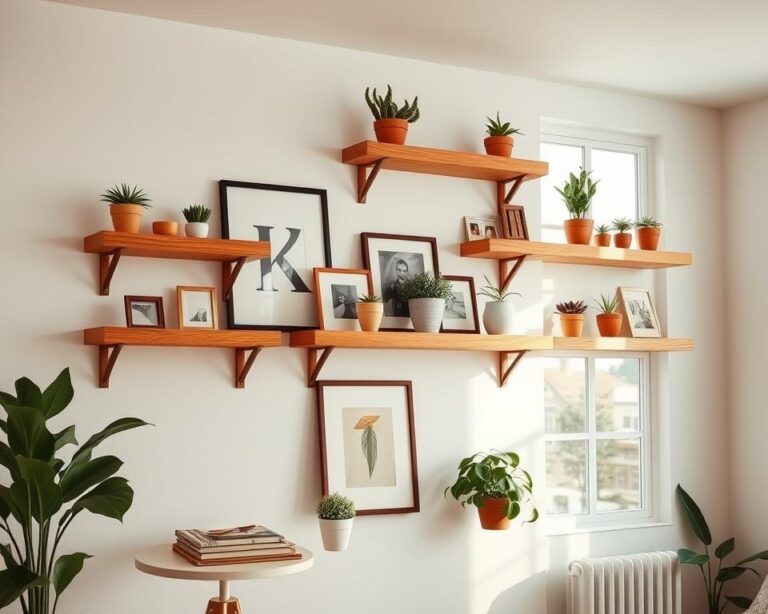
Crafting a Picture Frame for Your Home
Making a picture frame adds a personal touch to your home. It’s a great beginner woodworking idea. With a few materials and tools, you can create something beautiful. Here are the steps to help you through this rewarding project.
Choosing Your Wood and Design
Choosing the right wood is key for the look you want. Pine is light and affordable, while oak is sturdy. Walnut adds elegance. Think about your room’s style to match the frame.
Easy Steps to Assemble Your Frame
Begin by measuring and cutting your wood. A miter saw makes this easier. Use wood glue or nails for the back panel. Precision in cutting is important for a great finish.
Finishing Touches for a Unique Look
After assembling, add finishing touches. Sand the edges with different grits for smoothness. You can stain or varnish for a professional look. Add personal touches like engraved initials or painting.
This project lets you express your creativity and practice skills. Explore more at this resource. Soon, you’ll make stunning frames for your home.
Designing a Simple Wooden Stool
Making a simple wooden stool is a great way to start woodworking. It lets you add to your furniture and enjoy a fun crafting project. You’ll learn practical skills and add a personal touch to your space. So, get your materials and tools ready for this exciting project.
Materials and Tools You’ll Need
- Plywood or solid hardwood for the seat and legs
- Wood screws for assembly
- Wood glue for added strength
- Power saw for cutting pieces
- Drill for making pilot holes
- Sandpaper to smooth rough edges
- Finish (paint or stain) to personalize your stool
Instructions for Building Your Stool
- Cut your wood into the necessary dimensions for the seat, legs, and supports.
- Sand all the pieces thoroughly to eliminate splinters.
- Assemble the legs to the underside of the seat, ensuring they are evenly spaced.
- Add support beams by connecting the legs, which will help with the stool’s stability.
- Secure all joints with wood glue and screws for lasting durability.
Tips for Enhancing Stability and Comfort
To make your stool stable and comfy, pay attention to a few things:
- Check that all joints are tightly secured and aligned properly.
- Make sure the legs are identical in length for even support.
- Add rubber feet to the bottom of the legs if your floor surface is slippery.
- Ensure the seat height fits your needs, making adjustments as necessary during construction.

Maintenance Tips for Your Woodworking Projects
Keeping your woodworking projects in good shape is key. You’re not just making beautiful items; you’re creating lasting treasures. Regular cleaning is important. Use mild soap and water to avoid damaging the finish and keep things looking fresh.
Harsh chemicals can harm the protective layer of your wood. So, it’s best to avoid them when caring for your wood.
Scratches or minor dents are common and can be fixed. A little sanding and restaining can make your projects look new again. This is great for easy woodworking projects that might need a bit of care over time.
Knowing how to fix these small issues improves your woodworking skills. It also makes your items look better.
Also, watch for when it’s time to refinish your projects. If the wood looks worn, a professional refinishing service can bring back its original beauty. Keeping your woodworking creations well-maintained makes them last longer. By following these tips, each piece will stay a testament to your skill.