Did you know that nearly 80% of woodworkers think it’s key to master finishing wood without stains? This method keeps the wood’s natural beauty and guards it against damage. In this guide, you’ll find no-stain wood finish techniques that highlight the wood’s natural look and last long.
As you learn these techniques, remember to prioritize woodworking safety. This ensures your projects are not only beautiful but also safe to make.
Understanding Wood Finishing Techniques
Exploring wood finishing techniques is key for enhancing wood’s natural beauty and longevity. The right finishing method improves looks and protects against moisture and UV damage.
The Importance of Proper Finishing
Proper finishing is more than just looks. Wood absorbs moisture easily, leading to warping or discoloration. Good finishing makes wood last longer and keeps its unique look.
Types of Finishing Techniques
There are many wood finishing techniques to choose from. Water-based finishes and wax protect wood without changing its color. Glossy finishes highlight the grain, while matte finishes offer a subtle look. Each technique has its own benefits.
Benefits of No-Stain Finishing
No-stain finishing has big advantages. It lets you see wood’s natural beauty without darkening it. This method keeps wood’s original look while protecting it from damage. Enjoy the benefits of no-stain finishes and see your wood’s true beauty.
Preparing Your Wood Surface
Getting your wood surface ready for finishing is key to a perfect look. You need to clean, sand, and fix any wood flaws. This makes sure the finish sticks well and looks great.
Cleaning and Sanding
First, clean the wood thoroughly. This removes dust, dirt, and any finish residue. Use a damp cloth or vacuum to get rid of loose particles.
After cleaning, sand the surface. The right sanding techniques and tools are crucial. Sanding smooths the surface and prepares it for the finish.
Choosing the Right Sandpaper
Choosing the right sandpaper is vital. Start with a lower grit, like 60 or 80, to remove big flaws. Then move to finer grits, such as 120 and 220. This prepares the wood well for finishing.
Repairing Flaws in Wood
Fixing wood flaws before finishing is essential. Use a wood filler to fill gaps and small holes. This makes the surface smooth and flawless.
Essential Woodworking Safety Tips
Woodworking can be fun and rewarding, but safety comes first. Basic safety tips for beginners make your projects safer and more enjoyable. Using the right safety gear, keeping your workspace tidy, and knowing how to use tools are key to a safe environment.
Proper Safety Gear to Use
The right safety gear is your first defense against injuries. Before starting, make sure you have:
- Safety goggles to protect your eyes from dust and debris.
- Cut-resistant gloves to keep your hands safe from sharp tools.
- Dust masks or respirators to avoid breathing in harmful particles.
Wearing this gear makes your hobby safer. It lets you enjoy the craft without worrying about risks.
Keeping Your Workspace Organized
A clean workspace is safer. Keeping tools, materials, and debris organized prevents accidents. You can do this by:
- Setting up specific areas for tools and materials.
- Cleaning up spills or debris right away.
- Keeping paths clear to avoid tripping.
An organized workshop is safer and more efficient. It helps you work better and faster.
Understanding Tool Safety
Knowing your tools well is crucial for safety. A good tool safety guide for beginners teaches you important things, like:
- Always reading the manufacturer’s instructions before using.
- Choosing the right tool for the job.
- Keeping tools in good condition and knowing when to replace them.
Learning about tool safety makes you more confident and safe while working.
Common Wood Finishing Products
Starting your wood finishing project? Knowing about different finishes is key. The right finish can make your wood look great and protect it. Let’s look at some finish types and their benefits.
Overview of Finish Types
There are mainly three types of wood finishes: varnishes, oils, and lacquers. Each has its own purpose and look. Varnishes are tough and come in many sheens. Oils soak into the wood, bringing out the grain. Lacquers dry fast and are great for detailed work.
Advantages of Clear Coatings
Clear coatings are a big plus for wood finishing. They protect against scratches and moisture, yet let the wood’s beauty show. You can pick from satin, semi-gloss, or gloss finishes to match your style.
Exploring Oil-Based Finishes
Oil-based finishes are known for their lasting quality and simple use. They go deep into the wood, enhancing color. They can make the wood look darker, but this adds warmth and depth. It’s important to know how they affect your wood project.
| Finish Type | Durability | Sheen Options | Application Ease |
|---|---|---|---|
| Varnish | High | Satin, Semi-gloss, Gloss | Moderate |
| Oil | Moderate | Natural (varies) | Easy |
| Lacquer | High | Gloss | Easy |
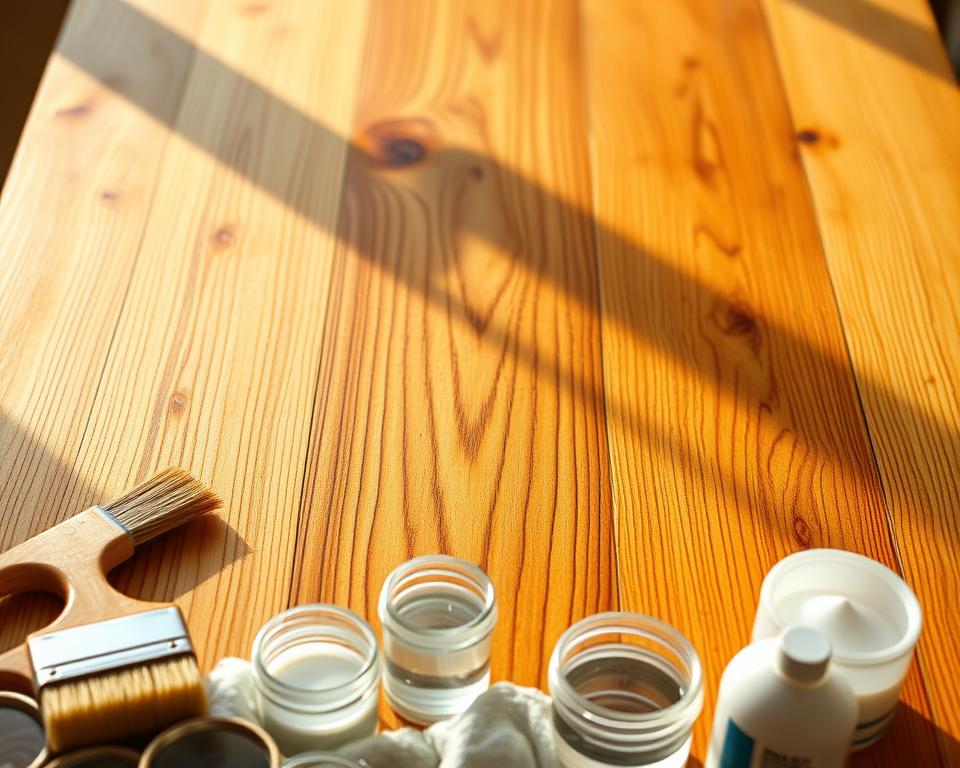
Applying a Clear Finish
Applying a clear finish can make your wood projects look better and last longer. It’s important to choose the right way to apply it. You can use brushes, rollers, or sprays, each with its own benefits.
Knowing how to apply it well will help you get a smooth finish. This makes your project look great.
Choosing the Right Application Method
The way you apply the clear wood finish matters a lot. Brushes are good for detailed work, like intricate designs. Rollers are fast and even for big areas. Sprays give a fine mist and fewer brush marks.
Think about your project’s size and your skill with each method. This will help you choose the best one.
Step-by-Step Application Guide
- Stir the finish well before use to ensure an even mixture.
- Using your chosen method, apply thin, even coats to the wood surface.
- Allow adequate drying time specified on the product label.
- Lightly sand the surface between coats to enhance adhesion and achieve a smoother feel.
- Repeat the application until achieving the desired depth of finish.
Tips for Even Coverage
Getting even coverage is key to avoid streaks or patches. Here are some tips:
- Work in manageable sections, preventing the finish from drying before you can spread it.
- Maintain a wet edge during application to blend each section seamlessly.
- Avoid overworking the finish, as this can lead to undesirable texture or unevenness.
Finishing with Varnish
Varnish is great for finishing wood, giving it protection and a shiny look. It’s important to know the different types of varnish and how to apply them. Also, knowing how long each varnish takes to dry is key for a perfect finish.
Types of Varnish Available
There are many varnish types for different projects. You can choose the best one for your needs. Here are a few main categories:
- Oil-Based Varnish: It goes deep into the wood and lasts long. It makes the wood grain look better but dries slowly.
- Water-Based Varnish: It dries fast and has a low smell. It’s good for indoor projects and easy to clean up.
- Polyurethane Varnish: It comes in oil and water-based forms. It protects well against scratches and chemicals.
Application Techniques for Varnish
Applying varnish right is key for a smooth finish. Here are some good techniques:
- Use a High-Quality Brush: A good brush helps avoid brush marks and makes the application smoother.
- Spray Application: For big surfaces, spraying varnish evenly covers the area and reduces brush strokes.
- Thin Coats: Putting on thin coats instead of one thick coat makes the finish last longer and look better.
Curing and Drying Time Considerations
Knowing how long varnish takes to dry is important for planning your project. The drying time varies a lot between varnish types:
| Varnish Type | Drying Time | Curing Time |
|---|---|---|
| Oil-Based Varnish | 6-8 hours | 24-48 hours |
| Water-Based Varnish | 1-2 hours | 7 days |
| Polyurethane Varnish | 4-6 hours (oil), 2-3 hours (water) | 24-72 hours |

Working with Natural Oils
Natural wood oils, like linseed and tung oil, protect your wood projects well. They also make the wood grain look beautiful. These oils are simple to use, get deep into the wood, and need less upkeep than other finishes.
Benefits of Using Natural Oils
Natural wood oils make the wood grain stand out without a thick finish. They let the wood breathe and protect it from moisture. This results in a finish that looks organic and beautiful, keeping the wood looking good for a long time.
How to Apply Natural Oils
Start by making sure your surface is clean and dry. Use a soft cloth or brush to spread the oil evenly. Move the oil into the wood in circular or straight motions. Let it soak in before wiping off any extra. This method gives a rich, beautiful finish.
Maintenance of Oil-Finished Surfaces
Keeping oil-finished surfaces clean is easy. Just use a damp cloth to wipe away dust and dirt. If the surface looks dull or dry, apply more oil to bring back its shine and protection. Regular checks and touch-ups will keep your wood looking great for years.
Exploring Wax Finishes
Wax finishes for wood are great for making your furniture and wooden items look better and stay protected. They add a nice shine and help prevent scratches and moisture damage. Learning how to use wax can take your woodworking to the next level.
Benefits of Wax in Wood Finishing
Wax finishes have many benefits of wax that can really enhance your wood projects. These include:
- Natural look and feel that highlights the wood’s grain
- Easy application with minimal drying time
- Repairable surface that allows for spot treatments
- Non-toxic options available, making it safe for furniture
- Creates a breathable finish, helping to maintain the wood’s integrity
How to Apply Wax Properly
Applying and maintaining wax finishes is easy. Just follow these steps for the best results:
- Start with a clean, sanded surface for better adhesion.
- Use a soft cloth to apply a thin layer of wax, following the wood grain.
- Let the wax set for a few minutes to absorb.
- Buff the surface with a clean cloth to get the right sheen.
Wax Maintenance Tips
Keeping your wax finish looking good is simple. Here are some tips:
- Regularly buff with a soft cloth to refresh the sheen.
- Avoid too much moisture to protect the wax layer.
- Reapply wax as needed, especially in busy areas or where it wears off.
Enhancing Wood Grain Without Stain
In woodworking, making wood grain stand out without stain can really change your project. It shows off the wood’s natural beauty. By using certain techniques, you can make the wood’s patterns and colors pop without hiding them. Here are some ways to get this look.
Techniques to Amplify Natural Grain
Using natural oils and clear finishes is a great way to enhance wood grain. These methods let the wood keep its natural look while adding depth. Here are some techniques to try:
- Apply a coat of natural oils like tung or linseed oil to make the wood’s unique features stand out.
- Use a clear epoxy resin for a glossy finish that highlights the grain and protects it.
- Experiment with water-based finishes for a subtle shine that lets the grain show.
Using Gloss and Sheen to Your Advantage
The gloss level can greatly change how wood grain looks. Picking the right sheen is key to enhancing wood grain without stain. Here are some options:
- Satin finishes give a soft glow that highlights the grain’s natural beauty.
- Matte finishes offer a subtle look that makes imperfections less noticeable while still showing wood patterns.
- High-gloss finishes, used carefully, can make a bold statement by reflecting light and focusing on details.
Products to Highlight Wood Grain
There are many products designed to enhance wood grain, giving great results without stain. Some include:
- Satin finishes like Minwax Polycrylic can make the grain stand out while being durable and color-neutral.
- Natural oils from brands such as Osmo can deepen the wood’s color while keeping its original design.
- Specialty wood oils, like Danish oil, blend varnish and oil to enhance the wood’s beauty and protect it.

Preventing Wood Damage
Keeping your wood surfaces in good shape is crucial. Knowing how humidity affects wood helps you take the right steps. By following simple tips, you can keep your wood looking great for years to come.
Dealing with Moisture and Humidity
Moisture is a major cause of wood damage. Too much humidity can make wood warp and swell. Too little can cause it to crack. Here’s how to fight these problems:
- Use a dehumidifier in humid areas.
- Keep wood in places with controlled moisture.
- Check your home’s humidity often and keep it between 30% and 50%.
Protecting Wood from Scratches
Scratches can ruin the look of your wood. To avoid this, take action early. Here are some ways to shield your wood:
- Apply varnish or oil to protect it.
- Place coasters or pads under heavy items.
- Clean your wood often to stop dirt from scratching it.
Long-Term Care for Finished Wood
Having a care routine is essential for your wood’s longevity. Regular cleaning and gentle handling can make your wood last longer. Here are some tips for long-term care:
- Dust your wood gently with soft cloths to avoid scratches.
- Reapply protective finishes regularly to keep it looking new.
- Check for wear or damage often and fix it right away.
Final Touches in Wood Finishing
Adding the final touches to wood finishes can really make your project stand out. These last steps are key to getting a polished look that’s both beautiful and durable.
Polishing Your Finished Project
Polishing wood is a vital part of finishing. The right polish gives a glossy finish that looks great and protects the wood. Use microfiber cloths to apply it evenly. Regular polishing also keeps your woodwork dust-free and looking new.
Adding Decorative Elements
Using decorative techniques like inlays or carvings can make your woodwork truly special. These details can turn a basic piece into a stunning centerpiece. Make sure they match the wood’s natural look and the finish for a unified appearance.
The Importance of Timing
Timing is crucial in wood finishing. Wait long enough for the finishes to dry before adding more details. This ensures the surface is ready for extra features without losing quality. Applying everything at the right time helps achieve a flawless finish.
| Final Touches | Description |
|---|---|
| Polishing | Enhances shine and protects against dust. |
| Decorative Elements | Elevates design through inlays and carvings. |
| Timing | Ensures finishes cure properly for best results. |
Troubleshooting Common Issues
Even the most skilled woodworkers face problems when finishing wood. Troubleshooting wood finishes is key. Issues like uneven coats, cloudiness, and drips can ruin your project’s look. Knowing the causes, like wrong drying times or contamination, helps fix these problems.
Fortunately, many common issues have easy fixes.
Fixing Mistakes in Clear Finishing
Light sanding is often the solution for fixing mistakes. If your finish looks rough or cloudy, sand it gently with fine-grit paper. Then, apply a thin layer of clear finish again. This method can fix your surface without a lot of extra work.
Remember, drying times and the environment play big roles in your results.
Common Problems and Solutions
Problems like bubbles or peeling can also occur. Bubbles usually come from too much stirring when applying the finish. So, stir carefully. For peeling, sand the area and start over.
If damage is severe or you’re unsure what to do, it’s time to seek professional help. Experts can make sure your wood is safe and your project looks great.