Did you know over 1.6 billion pieces of wood are used in art and craft projects every year in the U.S.? Wood engraving is a timeless craft that turns simple wood into stunning art. If you want to start wood engraving without a laser, you’re in the right spot. This guide will show you how to sand wood, the tools you need, and techniques to make your wood engraving at home fun and rewarding. Get ready to explore wood sanding techniques perfect for beginners!
Understanding Wood Types for Engraving
Choosing the right wood is key when starting wood engraving. Each wood type has its own qualities, affecting your project’s quality and detail. Knowing the difference between hardwoods and softwoods helps you pick the best wood for your projects.
Hardwoods vs. Softwoods
Hardwoods are denser, perfect for detailed engraving without chipping. Maple, oak, and walnut are top picks for engraving. They show off beautiful grain patterns, adding depth to your work.
Softwoods, like pine and cedar, are lighter and simpler to carve. They’re easier to work with but might lack the detail of hardwoods. Knowing the wood types helps you choose the right one for your project.
Popular Choices for Engraving Projects
Some woods are more popular for engraving because of their unique traits. Basswood is loved for its even texture and light color, making it great for detailed designs. Birch is another favorite, known for its smooth surface, perfect for engraved art.
Both basswood and birch are top choices for engraving. They’re reliable and versatile, making them popular in the woodworking world.
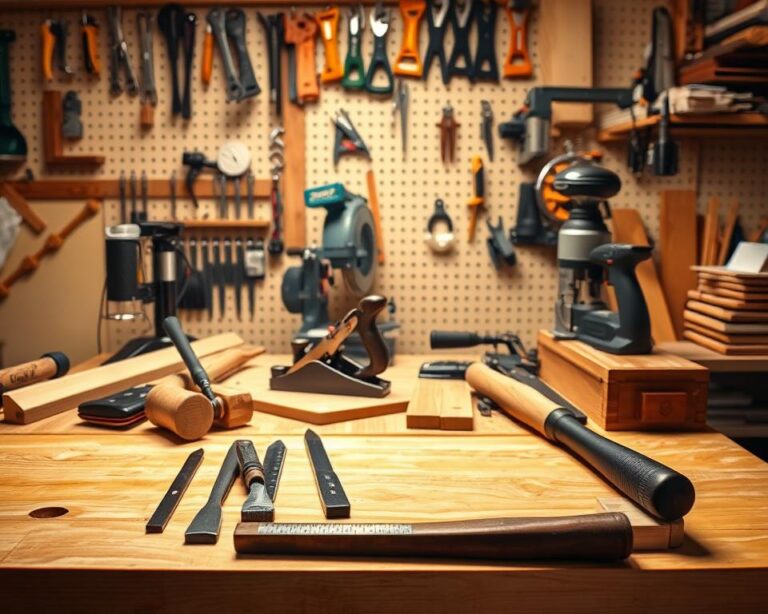
Essential Tools for Wood Sanding
To get a perfect finish on your wood project, you need the right tools. Knowing the types of sandpaper and choosing between power tools or hand tools is key. Also, having the right accessories can make a big difference in your work’s quality.
Sandpaper Grits Explained
Sandpaper grit ranges from coarse to fine. Picking the best sandpaper for wood is crucial. Coarse grits, like 40-80, quickly remove material, perfect for rough shaping.
Medium grits (100-150) act as a bridge between coarse and fine. Fine grits (220-400) give the polish needed for a smooth finish. Using the right grit progression prevents scratches and shows the wood’s beauty.
Power Tools vs. Hand Tools
When sanding, you can choose between power tools and hand tools. A sanding machine for wood makes sanding faster, great for big surfaces. But, hand sanding gives you more control, ideal for detailed work.
Using both power tools and hand tools together can lead to amazing results. Keep these sanding wood tips in mind as you plan your project.
Must-Have Accessories
Accessories make sanding better and more efficient. Key items include:
- Sanding blocks for better grip and control
- Dust masks to protect your lungs from wood particles
- Safety goggles to shield your eyes from debris
- Clamps to secure your wood piece while sanding
Getting these essential tools and accessories ensures a smoother sanding process. This sets the stage for a flawless engraving project.
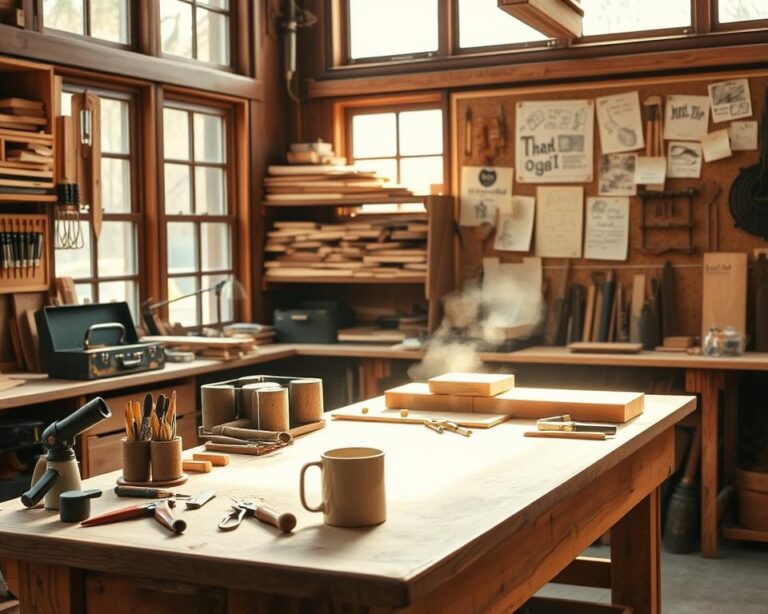
Preparing Your Workspace for Wood Engraving
Setting up a good workspace for engraving is key to a successful project. A clean and safe area helps you work better and be more creative. Make sure your workspace is both safe and neat for your DIY wood sanding and engraving.
Safety Gear You Should Wear
Wearing the right safety gear is crucial when working with wood. Before starting, put on these essential items:
- Safety goggles: Keep your eyes safe from dust and debris.
- Dust mask: Stops you from breathing in harmful particles.
- Ear protection: Protects your hearing when using power tools.
- Gloves: Use padded gloves for better grip and to avoid splinters.
Organizing Your Tools and Materials
Having a well-organized workspace helps you work more efficiently. Here are some tips:
- Place sandpaper, engraving tools, and finishes where you can easily reach them.
- Keep your work surface clean to avoid distractions.
- Use labeled containers for small items to make them easier to find.
Disorganization can waste a lot of time and ruin your project. Your engraving workspace should also have good lighting and air flow. Good lighting helps you see details, and air flow keeps dust and fumes away, making your workspace healthier.
| Safety Gear | Purpose |
|---|---|
| Safety goggles | Protects eyes from debris |
| Dust mask | Prevents inhalation of harmful particles |
| Ear protection | Safeguards hearing from noise |
| Padded gloves | Enhances grip and protects against splinters |
Starting a wood engraving project right is important. Choosing the right safety gear and organizing your workspace well improves your safety and the quality of your work.
Setting Up Your Wood Piece
Getting your wood piece ready is key for a great engraving job. First, measure and mark your design right. Knowing how to measure wood ensures your design fits perfectly. This makes your engraving look good.
Measuring and Marking
Use a ruler or tape measure to get the wood’s size. Find the center and mark it. This is where your design goes. Use a pencil or transfer paper for a precise design.
Choosing the Right Area to Work
Your workspace is important for engraving. Pick a flat, stable spot for your tools and materials. A clean workspace helps you focus and work better.
https://www.youtube.com/watch?v=9WNd82-K09E
How to Sand Wood: Basic Techniques
Sanding wood is key to getting the finish you want for any engraving project. Using the right wood sanding techniques makes sure your wood is ready for engraving. Knowing how to sand wood well can greatly improve your final design’s quality.
Starting with Rough Grit Sandpaper
Start with sandpaper that’s 80 to 100 grit. This first step is important for getting rid of big imperfections, rough edges, or splinters. Always sand in the wood grain direction. This keeps the natural texture and avoids damaging the wood grain.
Transitioning to Finer Grit Sandpaper
After smoothing out the rough spots, switch to finer grits like 120 to 220. This step refines the surface even more. Keep sanding in the grain direction to remove any scratches from the coarser grit. It’s important to check your work often to get a smooth finish.
Preventing Uneven Surfaces
To prevent uneven surfaces that could mess up your engraving, sand with consistent pressure. Keep your hand steady and check for any spots you missed. Proper sanding gets your wood ready for finishing touches like staining or sealing. For more on finishing, check out how to add a rustic finish to your woodworking.
Tips for Achieving a Smooth Finish
When you start sanding wood, following certain tips can make a big difference. A smooth finish makes your project look better. Using consistent techniques is key to getting the best results.
The Importance of Uniform Pressure
It’s important to apply even pressure while sanding. If you press too hard or too soft, you might get gouges or uneven spots. Keep your hand moving smoothly over the wood to sand evenly. This is crucial for a smooth finish, especially for engraving projects.
Checking for Flaws During Sanding
Checking your work often while sanding can save you time and effort. As you sand, run your hand over the wood to find any scratches or rough spots. Fix these problems right away to keep your work looking good. If you ignore these issues, your final piece might not be as good. Regular checks are part of effective sanding and help you achieve a smooth finish.

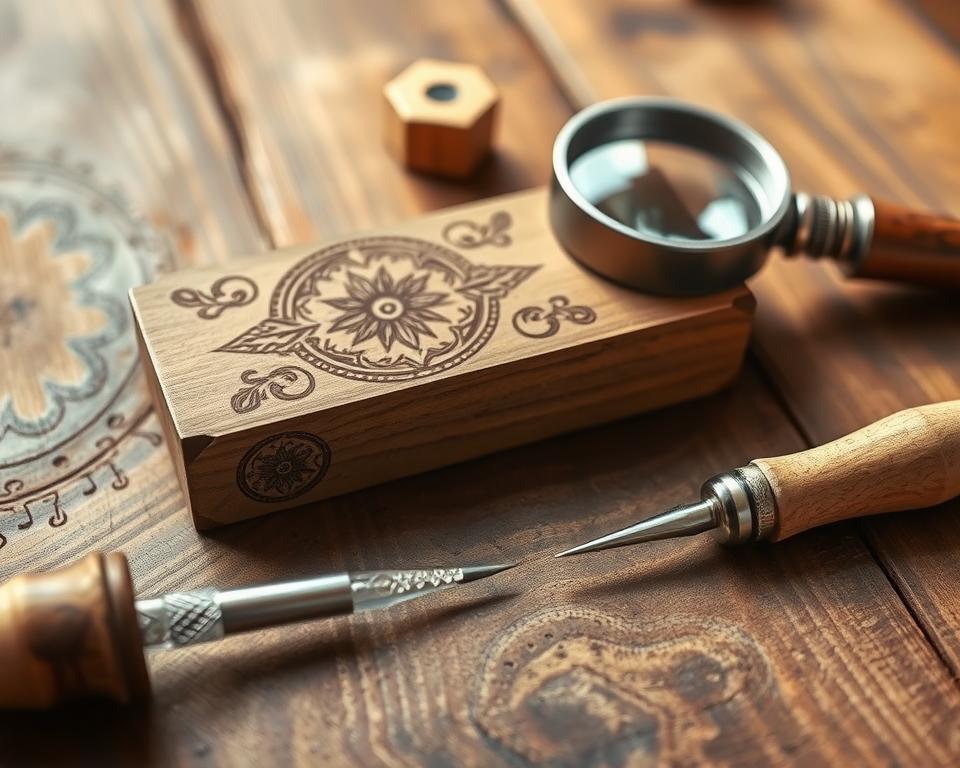
Engraving Techniques to Complement Sanding
After sanding your wood to perfection, you can try different engraving techniques. These methods, like using stencils and freehand techniques, add beauty to your work. They let you create amazing designs.
Using Stencils for Precision
Stencils make your designs more precise. They’re great for detailed patterns. Stencils keep your work uniform, making each detail look just right.
Make sure the stencil is tight on your wood to avoid slipping. Pick materials that work well together to keep your stencil and wood safe.
Freehand Engraving Tips
Freehand engraving lets you show off your creativity. It’s flexible, allowing you to make unique designs. Start by getting to know your tools and practicing your grip.
Lightly sketch your design on the wood first. This helps guide you, especially with complex shapes. With practice, you’ll get better at freehand engraving.
Maintaining Your Tools for Longevity
Keeping your woodworking tools in good shape is key to great projects. Regular cleaning and proper storage help your tools last longer. This includes tools for engraving.
Cleaning Sanding Tools
Start by cleaning your engraving tools after each use. Sawdust and debris can build up and hurt performance. Use a soft brush or cloth to clean hard spots.
For sandpaper, a cleaning block can restore its grit. This keeps your sanding tools in top shape for future projects.
Storing Tools Properly
Organizing your tools is just as important. Store them in a dry, organized area to avoid rust and damage. Use toolboxes, shelves, or racks for a tidy space.
Knowing where each tool is saves time and prevents loss. It makes your work easier and more efficient.

Exploring Finishing Options for Your Engraved Wood
After engraving, picking the right finish is key to look and durability. Many wood finishes protect your work and add beauty. Two top choices are wood stains and clear coat finishes.
Applying Stains for a Deep Hue
Wood stains bring out the wood’s natural beauty. They soak into the wood, making the grain stand out and deepening the color. Choose a stain that matches your design. Try different colors on scrap wood to see how they look with your engravings.
The Benefits of Clear Coat Finishes
Clear coat finishes protect against moisture, dirt, and wear. They highlight the wood’s grain and can be glossy or matte. Make sure to apply evenly to avoid streaks. This step not only looks great but also makes your piece last longer.
Try different finishes to find what suits your style best. A well-finished piece shows off your skill and attention to detail.
Common Mistakes to Avoid in Wood Engraving
Starting your wood engraving journey? Knowing common mistakes can make a big difference. It saves time and reduces frustration, leading to better results.
Over-sanding Dangers
Remember, don’t over-sand. Smooth surfaces are key for quality engraving. But too much sanding can make areas uneven.
This can mess up your engraving, leading to poor designs. Finding the right balance in sanding is crucial for a solid base for your art.
Miscalculating Grit Progression
It’s important to understand sanding grit progression. Using the wrong sandpaper at each stage can leave marks that show up later.
Take your time to pick the right grit for each step. Checking your work and adjusting as needed helps you get the best results.
Inspiration for Your Wood Engraving Projects
Finding inspiration can make your wood engraving projects stand out. Whether you want personalized gifts or home decor, unique ideas can spark your creativity. Think about making custom engravings for special occasions or seasonal decorations.
These projects not only show off your skills but also create lasting memories for those who get them.
Unique Ideas to Spark Creativity
Exploring different themes can help you think outside the box. Try nature-inspired designs, geometric patterns, or whimsical illustrations. Experiment with various styles and techniques to create wood designs that reflect your artistic vision.
Connecting with other creators can also bring new ideas. It makes the process more fun and rewarding.
Resources for Advanced Techniques
Joining online communities and attending workshops can help you learn more. There are many books, videos, and tutorials for all skill levels. These resources can help you discover new techniques and create innovative designs.
As you explore these materials, you’ll find ways to make your wood engraving projects even more fulfilling.