Did you know nearly 75% of homeowners love to make their outdoor spaces special? They use outdoor wood crafts, like wooden wall art DIY, to show off their style. These projects turn simple materials into beautiful pieces that make your backyard feel cozy and inviting.
Whether you’re into detailed designs or simple DIY wood wall hangings, there’s something for everyone. These rustic wood art tutorials are not just about beauty. They also offer a fun and rewarding creative journey. Plus, making these projects can be a great way to spend time with family or friends, creating memories as you work together.
Why Choose Wooden Wall Art for Your Backyard
Wooden wall art is a great choice for your backyard. It combines beauty with durability. The natural look of wood fits well with outdoor settings, adding texture and color.
It’s not just about looks. Wooden wall art also connects you with nature. This is especially true in garden settings.
Benefits of Wooden Wall Art
- Durability: Wooden pieces can handle the weather better than many other materials.
- Natural Aesthetics: Wood’s organic feel can soften outdoor areas’ harsh lines.
- Customizability: You can make your designs personal, showing off your style and interests.
- Conversation Starters: Unique designs can draw attention and spark conversations.
Enhancing Your Outdoor Space with Art
Adding creative wooden wall decor can make your outdoor space better. Choose designs that match your interests, like nature or family themes. Quotes can also add motivation.
Wooden wall art brings your backyard to life. It adds personality and creates cozy spots for relaxation and fun.
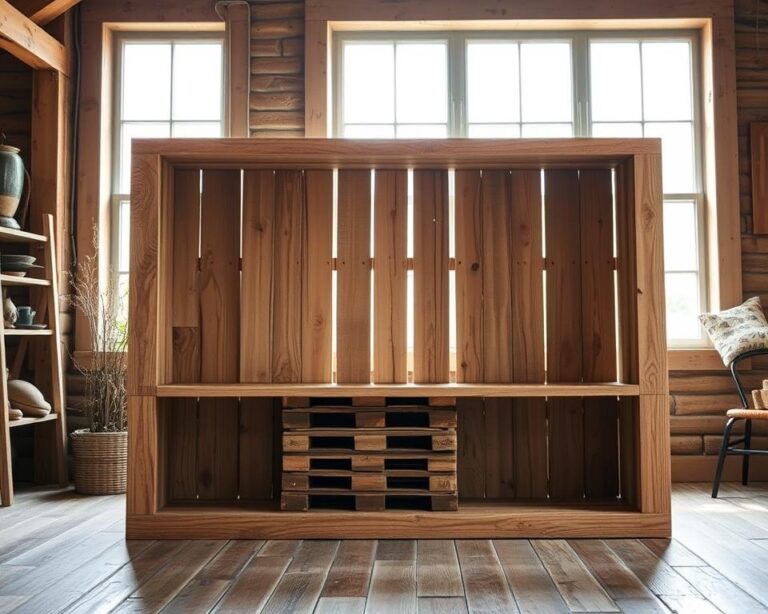
Types of Wooden Wall Art You Can Create
Your backyard is a perfect place to show off your creativity with wooden wall art. There are many styles to choose from, each one unique and personal. Making rustic wood art is fun, letting you add your own special touches. Explore these creative options to bring your vision to life.
Rustic Signs and Banners
Rustic signs and banners add a personal touch to your outdoor space. They can have family names or seasonal messages, making your backyard feel warmer. A tutorial on rustic wood art can help you make these using reclaimed wood. This way, you create something eco-friendly that tells a story.
Nature-Inspired Designs
Nature-inspired designs blend art with the outdoors. You can use shapes and motifs like leaves, flowers, or animals. These designs bring a sense of calm and connection to nature, perfect for a serene backyard. They turn simple wood pieces into beautiful expressions of nature.
Functional Art Pieces
Functional art pieces make your wooden wall art projects even better. Think wall-mounted planters or hooks. They’re useful and artistic at the same time. This shows how creativity and practicality can go hand in hand. Making these pieces is both fun and useful for your outdoor space.
Tools and Materials You’ll Need for DIY Projects
Starting your wooden wall art project needs careful tool and material selection. Quality items help you make pieces that last long.
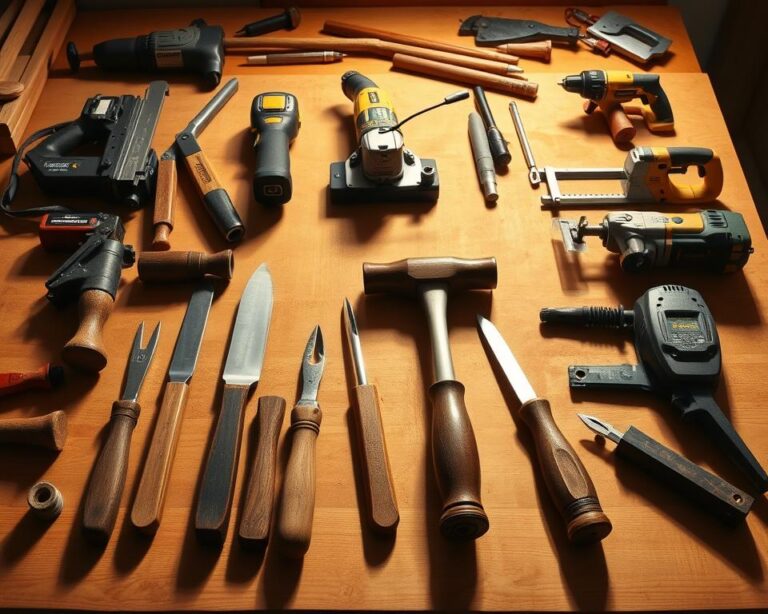
Essential Tools for Woodworking
Getting the right woodworking tools makes crafting better. Here are the must-haves:
- Saw: Pick a circular saw or jigsaw for cutting wood.
- Sandpaper: Use different grits for a smooth finish.
- Drill: It’s great for holes and fastening.
- Clamps: They keep pieces together while gluing or screwing.
Choosing the Right Wood and Finishes
Choosing wood depends on your design and where it will go. Here are some tips:
- Cedar: It’s good against insects and weather, perfect for outdoor art.
- Plywood: It’s affordable and stable for many designs.
Finishes protect your projects. Choose from stains or sealants for beauty and durability. The right tools and materials improve your wooden wall art’s quality.
Step-by-Step Guide to Creating Wooden Wall Art
Starting a wooden wall art project requires careful planning. Think about your design and sketch out ideas. Drawing inspiration from others can also help. This guide will help you turn your ideas into a beautiful piece.
Planning Your Design
First, pick a theme that fits your outdoor space. Consider colors and styles that match your backyard. Then, create a design layout for your piece. This step is key to keeping your artwork true to your vision.
Cutting and Shaping Your Wood
Now, it’s time to get hands-on with cutting and shaping. You’ll need the right tools for precise cuts. Always double-check your measurements to avoid errors. As you shape, remember the look you want to achieve. Stick to your plan and make adjustments as needed.
Painting and Finishing Touches
Once your wood is shaped, it’s time to paint. Choose colors that enhance your backyard’s look. Use outdoor paint or a sealant for durability. This is where you can add personal touches and textures. Let your creativity flow as you finish your piece.

Creative Ideas for Wooden Wall Art
Bring the beauty of the seasons to your backyard with creative wooden wall decor. Seasonal outdoor art projects can make your space lively and unique. Here are some inspiring ideas to try.
Seasonal Themes for Your Backyard Art
Make your wooden wall art reflect the seasons. This way, your outdoor space will feel fresh and special. Here are some seasonal ideas:
- Spring: Use pastel colors and flower motifs to celebrate renewal.
- Summer: Go for beach-themed decor with bright colors and beach elements.
- Fall: Choose warm colors and leaf patterns for a cozy feel. Add pumpkins or apples for a festive look.
- Winter: Opt for snowflake designs or holiday themes. Use whites, blues, and metallics for elegance.
Incorporating Natural Elements
Add natural elements to your wooden wall art. This will make your pieces truly unique. Consider using:
- Twigs and branches: Create frames or designs that look like the forest.
- Pebbles: Add smooth stones for dimension and a rustic feel.
- Pressed flowers: Mix in botanical elements for a whimsical touch.
Tips for Hanging and Displaying Your Wall Art
Choosing the right spot for outdoor art is key. It affects how well people see it and keeps it safe from the weather. Porches or awnings are great because they offer protection and still let people see your art.
You can also make an outdoor gallery wall. This means hanging many pieces together. It looks amazing and shows off your skill in displaying wooden wall art.
Best Locations to Hang Art Outdoors
- Under covered porches or awnings to shield against rain and direct sunlight.
- On fence panels or garden walls for a natural backdrop.
- Near seating areas to create an inviting atmosphere.
- In shaded spots where harsh sunlight won’t fade colors quickly.
Securing Art for Longevity in Weather
Keeping your art safe is important. Use weather-resistant hardware and strong hanging methods. This helps your art last longer, even in bad weather.
Think about using stainless steel or galvanized fixtures. They don’t rust and help your art stay beautiful for years.
Adding Personal Touches to Your Wooden Crafts
Adding personal touches to your wooden crafts makes your outdoor space more special. It turns simple projects into meaningful keepsakes. These pieces capture your unique experiences and memories.
Using Personal Photos and Memories
Adding personal photos to your wooden crafts is a beautiful way to remember special moments. You can use decoupage to put images on wood. This gives your decor a rustic, nostalgic feel, perfect for your personal photo wall.
Customizing with Quotes and Text
Adding quotes or meaningful phrases to your crafts lets you share your personality and values. When you create custom wooden art that tells your story, your outdoor space becomes more welcoming. It feels like home.
Maintenance Tips for Wooden Wall Art
Keeping your wooden wall art in good shape is key. Regular care helps it last longer and look better. Knowing how to care for outdoor wooden art is important. With a few simple steps, your favorite pieces can stay beautiful.
Keeping Your Art Weather-Resistant
Protecting your wooden crafts from the weather is crucial. Use protective finishes or sealants to keep it safe from moisture, UV rays, and bugs. Choose products made for outdoor use for the best protection. Check these barriers often to catch any damage early.
Cleaning and Touching Up Your Wall Art
Cleaning your wooden wall art regularly is important. Use mild soap and water with a soft cloth to keep it clean. Stay away from harsh chemicals that can harm the wood. While cleaning, look for any spots that need fixing. Fixing small issues quickly helps your art stay beautiful.

Getting Inspired by Others: Resources and Ideas
Finding inspiration for your wooden wall art projects can spark your creativity. It can also change your outdoor space. Online communities and forums for woodworking are great places to meet others who share your passion. They offer valuable insights and creative techniques.
Platforms like Pinterest and craft blogs are full of inspiration for wooden wall art. They have tutorials and unique design ideas. You can use these to make your backyard special.
Going to local craft fairs for DIY enthusiasts is also a great idea. These events let you see amazing creations and learn from artisans. You can get hands-on experience and learn new woodworking techniques.
Exploring different sources of inspiration can lead to new ideas for your wooden wall art. Use online forums and local craft fairs to fuel your creativity. This way, you can make beautiful pieces that show off your style and make your backyard even better.