Did you know nearly 80% of homeowners are adding natural elements to their homes? This trend shows how much people love wood in decor. By making your own wood shelves, you can make your space warmer and more personal.
Using homemade wooden shelves can make your home look better. It also shows off your skills in fun wood projects. Explore creative wood decor and see how simple wooden touches can make your home welcoming.
Why Choose DIY Wood Shelves for Your Space?
Building your own diy wood shelves is a great way to add function and style to your space. You get to design them exactly how you want, making sure they fit perfectly. Whether you want something bold or simple, the choices are endless.
Benefits of Building Your Own Shelves
One big plus of making your own shelves is being able to customize them. You can pick the size, style, and finish that fits your home. This makes your shelves more than just storage; they become a key part of your decor.
Cost-Effectiveness of DIY Projects
Going the DIY way can save you a lot of money. Ready-made shelves are often expensive, but making your own can be much cheaper. By choosing quality materials, you get durability without spending too much.
Personalization and Customization Options
Creating your own shelves lets you add your personal touch to each project. This customization shows off your taste, making your space truly yours. You can choose the wood grain or add special finishes that reflect your personality.
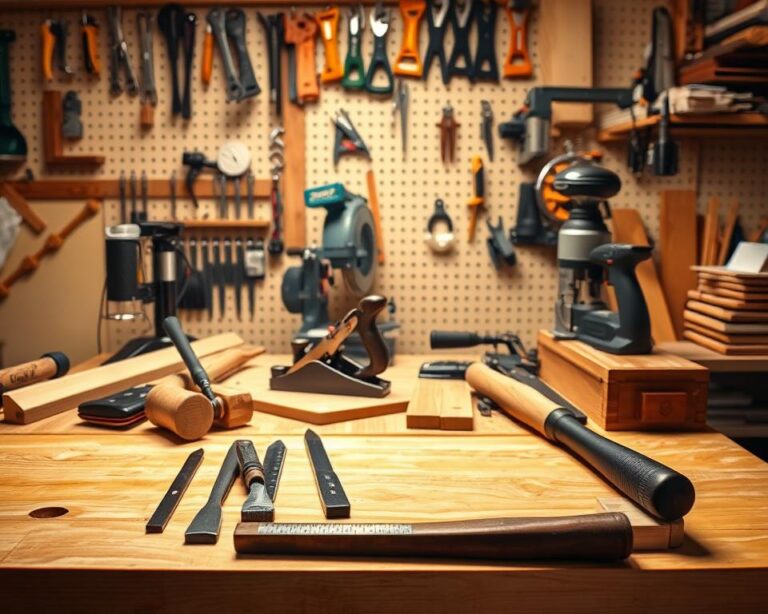
Essential Tools and Materials for DIY Shelves
Building your own wooden shelves can be very rewarding. It not only makes your home look better but also lets you show off your creativity. To start this easy wood shelf tutorial, you’ll need to gather the right tools and materials. Knowing what you need will make the process easier and improve your results.
Basic Tools You’ll Need
Before you begin, make sure you have these tools:
- Hand saw or circular saw – For precise cuts.
- Drill – Essential for making holes for screws.
- Measuring tape – To ensure accurate dimensions.
- Level – Necessary for keeping shelves straight.
Choosing the Right Type of Wood
The wood you choose affects your shelves’ look and durability. Here are some popular options:
- Pine – Affordable and easy to work with.
- Oak – A strong hardwood that offers a classic look.
- Reclaimed wood – Environmentally friendly and adds character.
Additional Materials and Supplies
Along with tools, you’ll need various materials:
- Screws – For securing shelves to the wall or brackets.
- Brackets – Choose durable options for added support.
- Wood finish or stain – To enhance the wood’s appearance and protect it.
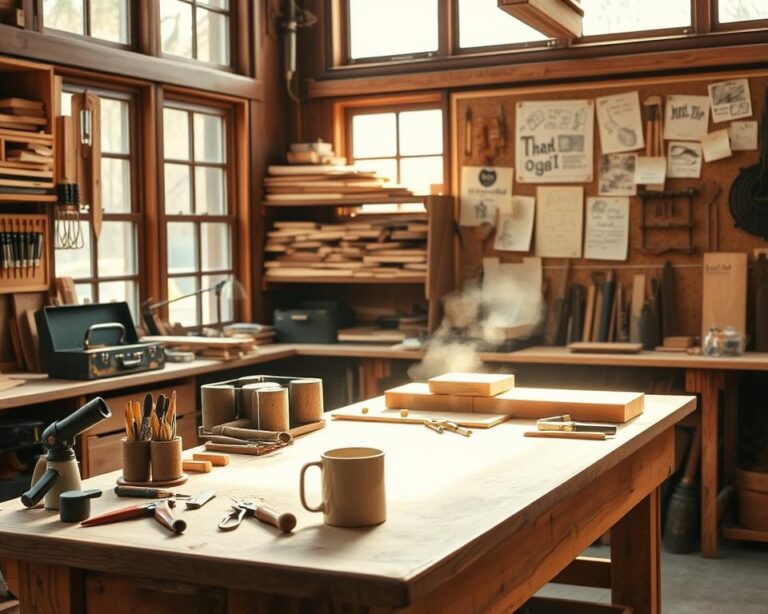
Planning Your DIY Wood Shelves Project
Starting your DIY wood shelving project needs careful planning. The success of your project depends on choosing the right materials and design. By planning well, you can make shelves that improve your space and meet your needs.
Determining the Right Location
Finding the perfect spot for your shelves is the first step. Think about how they will look and what they will do. They could be for storing things, showing off items, or just adding beauty to your room.
Measuring and Designing Your Shelves
Getting the measurements right is key for a perfect fit. Start by measuring the space where you’ll put the shelves. Drawing a design helps you see what it will look like. Include all the details you need for building them.
Creating a Project Timeline
Having a timeline helps you stay organized and on track. Decide how long you want the project to take. Include time for getting materials, building the shelves, and adding the final touches. A good timeline makes the project go smoothly.
Step-by-Step Guide to Building Basic Wood Shelves
Building your own wood shelves is a fun and rewarding project. This guide will help you from start to finish. You’ll learn how to make a rustic wood shelf that looks great and is useful. Let’s get started.
Preparing Your Workspace
First, make sure your workspace is ready. Clear out any clutter and have good lighting. Put all your tools and materials where you can easily reach them. A tidy workspace helps you focus on your project.
Cutting and Assembling the Wood
Be careful when cutting the wood to the right size. Use your design’s measurements carefully. Clamp the wood together as you assemble to keep it straight. This makes your shelf strong and easy to put together.
Finishing Touches: Sanding and Staining
After assembling, work on the finish. Start by sanding to smooth out any rough spots. This makes the wood look better and gets it ready for stain. Pick a stain that matches your room’s style. Finally, apply a sealant to protect the wood and make it last longer.

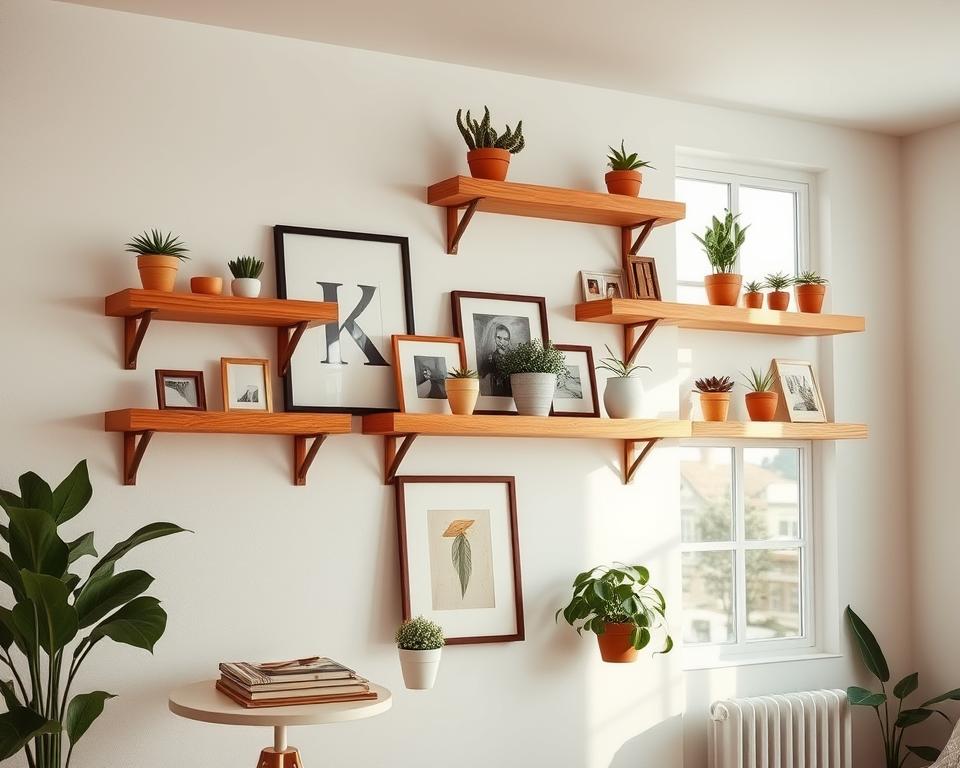
Stylish Ideas for DIY Wood Shelf Designs
Make your living space better with creative wood shelves. You can choose from modern to rustic styles. These designs can really improve your home’s look.
Floating Shelves for a Modern Look
DIY floating wood shelves add a sleek touch to your home. They make your space look bigger by seeming to float. Place them in your living room or kitchen to show off art or dishes.
Their simple design fits well with many decor styles.
Rustic Shelves for a Cozy Vibe
Looking for warmth? Rustic shelves from reclaimed wood are perfect. They add a cozy feel with their natural look and unique marks.
Build these for your entryway or bedroom. They’re great for holding personal items or books.
Corner Shelves to Maximize Space
Use corner spaces with DIY wood shelves. They’re a smart way to use areas that are often ignored. Corner shelves work well in bathrooms or offices, keeping things tidy.
Creative Ways to Decorate Your Wood Shelves
Decorating your DIY wood shelves makes them look better and shows off your style. Using DIY shelf ideas can turn a simple shelf into a story. Mixing natural things with your own items and decorations makes your space welcoming.
Incorporating Plants and Greenery
Adding plants brings life to your shelves. Pick easy-to-care-for plants like succulents or snake plants for a lively feel. They not only make your space look good but also clean the air. Use different sizes and shapes of plants to catch the eye. Decorative pots can add to your creative wood decor.
Using Books and Personal Items
Books add function and tell your story. You can stack them flat or stand them up for a neat look. Adding personal items like travel keepsakes or family treasures adds warmth. These DIY shelf ideas make your shelves more than just storage.
Adding Decorative Accents and Art
Decorative items like vases, sculptures, or art can make your shelves look better. Pick items that match your style and colors. Mixing materials like wood, metal, or glass adds interest. Unique art pieces can make your shelves stand out and spark conversations.
| Decor Element | Visual Impact | Best For |
|---|---|---|
| Plants | Adds color and freshness | Living spaces and home offices |
| Books | Functional storytelling | Libraries and studies |
| Decorative Accents | Stylish and personal touch | Any room |
By carefully choosing these elements, you can make displays that are both beautiful and meaningful. Your creative wood decor will be a unique part of your space.
Maintaining and Caring for Your Wood Shelves
It’s important to take care of your homemade wooden shelves. This keeps them looking good and working well for a long time. Here are some tips to help your shelves stay in great condition.
Regular Cleaning Tips
Keep your shelves clean with non-toxic solutions. A damp cloth can wipe away dust and dirt without harming the finish. For tougher spots, try warm water and mild soap. Stay away from harsh chemicals that can harm the wood’s natural oils.
Addressing Wear and Tear
Wear and tear can show up on your shelves over time, like scratches or color changes. Check your shelves often. For small scratches, use a wood marker or matching stain to fix them. If the color changes, you might need to refinish or restain the whole shelf.
Refurbishing Wooden Surfaces
Refurbishing your wooden surfaces can make them look new again. Lightly sanding the surface can remove old finishes and get the wood ready for new ones. After sanding, apply a fresh stain or sealant to bring back its shine. This way, you can keep your shelves looking great for years.
Exploring Sustainable Materials for Shelving
Choosing sustainable materials for your DIY wood shelves can greatly reduce your ecological footprint. By picking eco-friendly options, you help the environment and create beautiful spaces. This section looks at eco-friendly wood, upcycling furniture, and the benefits of sustainable practices.
Eco-Friendly Wood Options
For your DIY projects, consider bamboo or reclaimed wood. Bamboo grows fast, making it a green choice that’s strong and stylish. Reclaimed wood comes from old places, cutting down on waste and adding character to your shelves. Choosing these materials boosts your home’s look and supports the planet.
Upcycling Old Furniture
Turning old furniture into shelves is a creative way to be green. It gives new life to items that might end up in landfills. Upcycling lets you make unique shelves that show off your style and values, making your space special.
Benefits of Sustainable Practices
Practicing sustainability has many benefits beyond just looking good. It helps the environment and supports local businesses by using materials wisely. Plus, eco-friendly choices can make your home healthier by avoiding harmful chemicals in some woods.

Showcasing Your DIY Wood Shelves
After creating your own wood shelves, it’s time to celebrate. Sharing your DIY wood shelves can inspire others. It shows off the beauty of your work.
Use social media to share your project with many people. It connects you with others who love DIY projects. Your creativity should be seen, whether it’s rustic or modern.
Host a showcase event at your home. Invite friends and family to see your shelves. It’s a chance to share your project and appreciate craftsmanship.
Guests can explore your space and talk about your design. They might even want to try making their own DIY shelves.
Connecting with local DIY communities is also important. Joining groups can lead to new friendships and learning opportunities. You can share tips and get inspired by others.
Being part of a DIY community makes your crafting journey more fun. It turns your project into a shared experience.