Did you know over 60% of DIY fans start with wood? Making a wood lantern is a top pick for beginners. It teaches you key woodworking skills and lets you create beautiful wooden boxes.
This easy project will show you how to make a lovely wood lantern. It’s perfect for adding beauty and function to your home or garden. You’ll learn to make wooden boxes that show off your DIY skills!
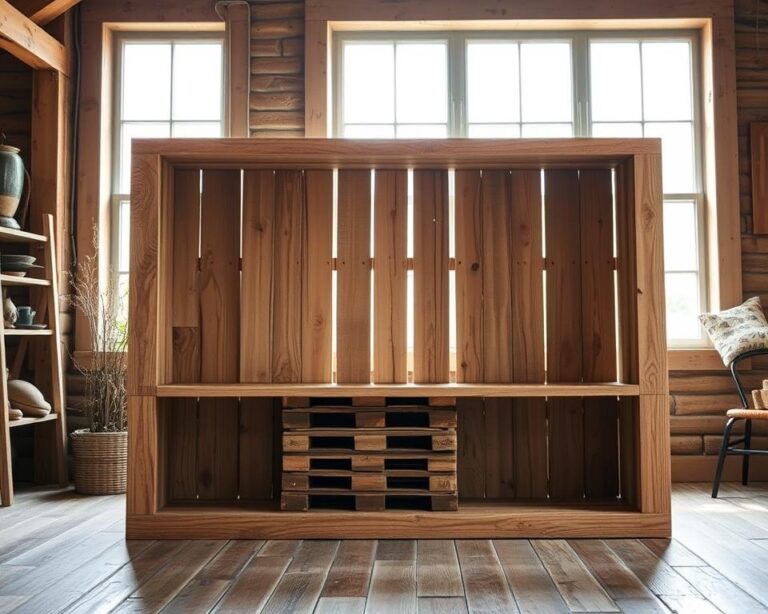
Introduction to DIY Wooden Boxes
Creating your own DIY wooden boxes is a fun and rewarding woodworking project. These boxes let you add your own unique touch that store-bought ones can’t. They also save you money and let you show off your creativity.
Benefits of Making Your Own Wooden Boxes
Making your own wooden boxes has many benefits, such as:
- Customization: You can make them any size, shape, or design you want.
- Cost-effectiveness: You can make beautiful items without spending a lot of money.
- Skill development: You’ll get better at woodworking with each project.
- Satisfaction: You’ll feel proud of what you’ve made with your own hands.
Materials You’ll Need
To start, you’ll need these materials for your DIY wooden boxes:
| Material | Description |
|---|---|
| Wood | Plywood or softwood, depending on your preference. |
| Wood Glue | For secure joints and assembly. |
| Nails or Screws | For added strength and stability. |
| Sandpaper | To smooth and finish the surfaces of your homemade wooden boxes. |
| Finish or Paint | Optional, for aesthetics and protection. |
Safety Tips for Woodworking
When working on woodworking projects, safety is key. Remember these tips:
- Always wear protective gear, including goggles and gloves.
- Work in a well-ventilated area, especially when using adhesives or finishes.
- Keep tools in good condition and use them as intended.
- Keep your workspace organized to prevent accidents.
Choosing the Right Wood for Your Lantern
When starting DIY woodworking projects, picking the right wood is key. It affects both how long it lasts and how it looks. Popular options like pine, cedar, and oak are great for lanterns. They’re easy to work with and strong, perfect for your rustic wooden boxes.
Types of Wood Suitable for DIY Projects
Pine is a favorite for DIY beginners because it’s light and cheap. It’s simple to cut and paint, making it great for newbies. Cedar is good for outdoor lanterns because it doesn’t rot easily. Oak is strong and looks good, adding both durability and style to your lantern.
Considerations for Weather Resistance
For outdoor lanterns, choose wood that can handle the weather. Teak and mahogany are top picks because they resist moisture well. Using the right wood and finishing techniques, like sealing with oils, helps your lantern last longer. This way, it can shine through rain or shine.
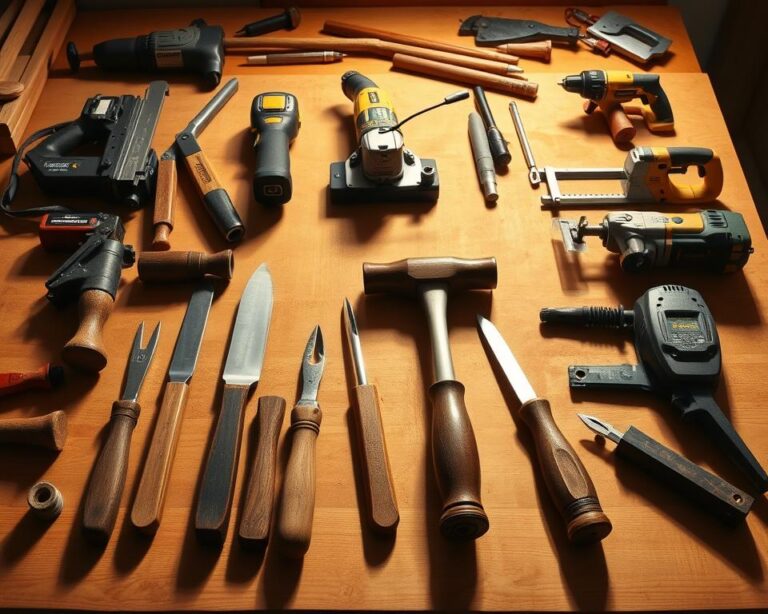
Tools Required for Your Wood Lantern
To make your wood lantern, you’ll need both essential hand tools and power tools. The right tools turn your DIY ideas into a real masterpiece. Knowing what you need makes the building process easier.
Essential Hand Tools
Start with these basic woodworking tools:
- Saw: A hand saw or a coping saw is great for precise cuts.
- Screwdriver: You’ll need it for putting parts together, whether Phillips or flathead.
- Clamps: They keep things steady, helping you work accurately.
- Square: This tool checks if your angles are right for your lantern.
- Measuring Tape: Getting your measurements right is crucial in woodworking.
Power Tools You Might Need
Power tools can make your project easier. They offer efficiency and precision:
- Miter Saw: Perfect for precise angled cuts.
- Jigsaw: Great for complex shapes and curves in your design.
- Drill: Essential for making holes and securing parts together.
Using the right tools makes your wood lantern project easier. It lets your DIY woodwork ideas come to life smoothly.
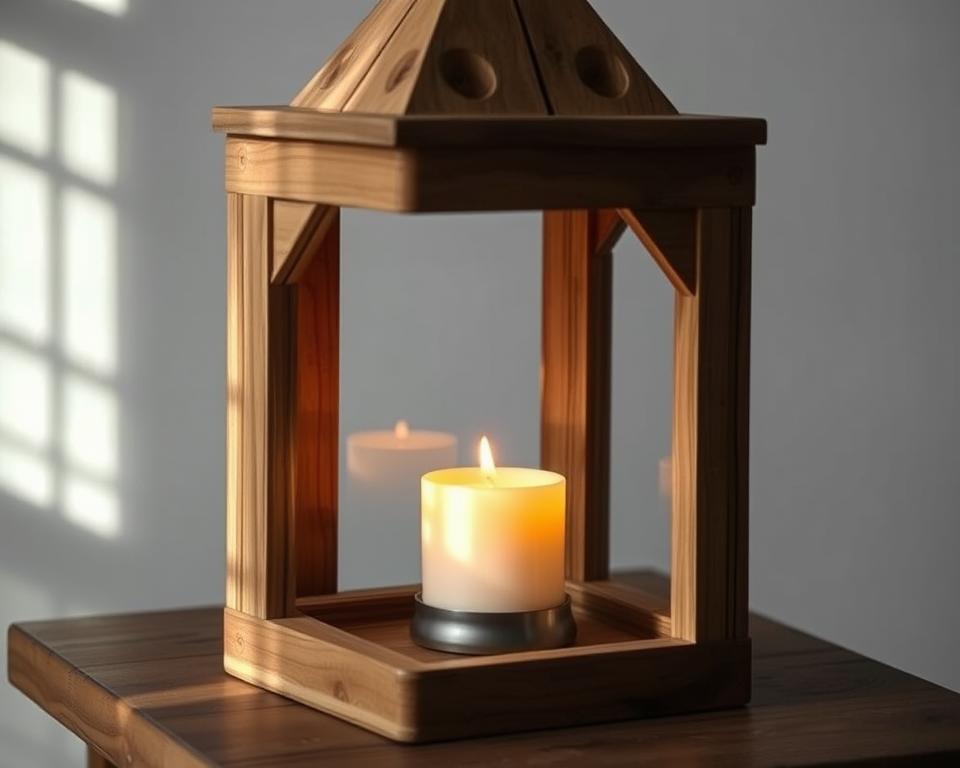
Step-by-Step Guide to Building Your Lantern
Making a wooden lantern is a fun DIY project. This guide will help you prepare the wood, build the base and walls, and add a lid. Each step is easy to follow, perfect for beginners.
Preparing the Wood Pieces
Start by picking the wood for your lantern. Measure and cut the wood as planned. Sand the edges to make them smooth and prevent splinters.
It’s important to prepare each piece well. This is true whether you’re making a simple or complex lantern.
Assembling the Base and Walls
Now, start assembling the lantern. Begin with the base. Use wood glue and attach the walls to it. Make sure they’re secure with screws.
Next, connect the walls to form a solid frame. Check that everything is square. This step is key for making both wooden boxes and lanterns.
Adding a Lid to Your Lantern
After the main structure is done, work on the lid. Cut a piece of wood that fits well on top. You can add decorations or cutouts for extra style.
Attach the lid with hinges. This makes it easy to light the lantern while keeping it looking good.

Decorating Your Wooden Lantern
Creating a beautiful wooden lantern lets you show off your style. Adding unique touches makes it stand out. You can use painting techniques, wood stains, and more to decorate it.
Painting Techniques for Wood
There are many ways to paint your lantern. Here are a few:
- Brush Painting: High-quality paint gives even coverage. It’s great for solid colors.
- Sponge Painting: A sponge adds texture. It’s perfect for depth in your projects.
- Spray Painting: Spray painting is quick and smooth. Just be careful not to spray other areas.
Using Stains for a Natural Look
Wood stains bring out the grain and add charm. Pick shades that fit your style. Remember to:
- Test the stain on a small area first.
- Apply coats for deeper color, letting it dry between each one.
- Use wood conditioner to avoid uneven stain.
Adding Additional Decorative Elements
Adding special touches makes your lantern unique. Here are some ideas:
- Add glass panels for elegance and light.
- Use handles or hooks for easy carrying.
- Decorate with ribbons, beads, or twine for a rustic feel.
Using painting techniques and wood stains brings your DIY ideas to life. Personalize your lantern with creative elements that show off your style.
Installing the Light Source
Choosing the right light for your wooden lantern is key for safety and mood. You can pick from many safe lighting options. These range from old-school methods to new ones. Knowing your choices will make your lantern both useful and beautiful.
Choosing Safe Lighting Options
Safety is first when you’re setting up lantern lighting. Candles can be cozy but are risky. Flameless candles, however, are a safer choice. They look like real candles but don’t have flames.
They’re great for a warm light in your lantern without the fire danger.
Tips for Proper Installation
After picking your light, installing it right is crucial. Here are some tips:
- Make sure there’s good air flow to avoid overheating, especially with flameless candles.
- Make sure the light is securely placed to prevent it from falling over.
- For outdoor use, pick materials that can handle the weather.

Finalizing Your DIY Wooden Lantern
When you reach the end of your wooden lantern project, focus on the finishing touches. Sanding the edges makes the finish smooth. The right sealants or protective coatings boost durability. This step is key for both looks and lasting use of your DIY wood projects.
Sanding and Finishing Touches
Start by sanding with fine-grit sandpaper to smooth out any rough edges. Pay extra attention to where pieces meet. This makes your lantern look polished and ready for display.
After sanding, think about adding a wood stain or sealant. This protects your lantern from moisture and wear. It makes sure your lantern stays beautiful and strong.
Quality Checks Before Use
Doing a detailed quality check is crucial for wooden boxes and structures. Check the strength of joints and corners. Make sure everything is well attached. Look for any wood or finish flaws and fix them right away.
If you find any assembly problems, fix them before using the lantern. This ensures it’s safe and works well.
| Quality Check Items | What to Look For | Action Needed |
|---|---|---|
| Joints | Tightness and alignment | Reinforce with glue if necessary |
| Surface Finish | Evenness and absence of bubbles | Sand and reapply finish if uneven |
| Durability | Overall sturdiness of the lantern | Adjust loose parts or add extra support |
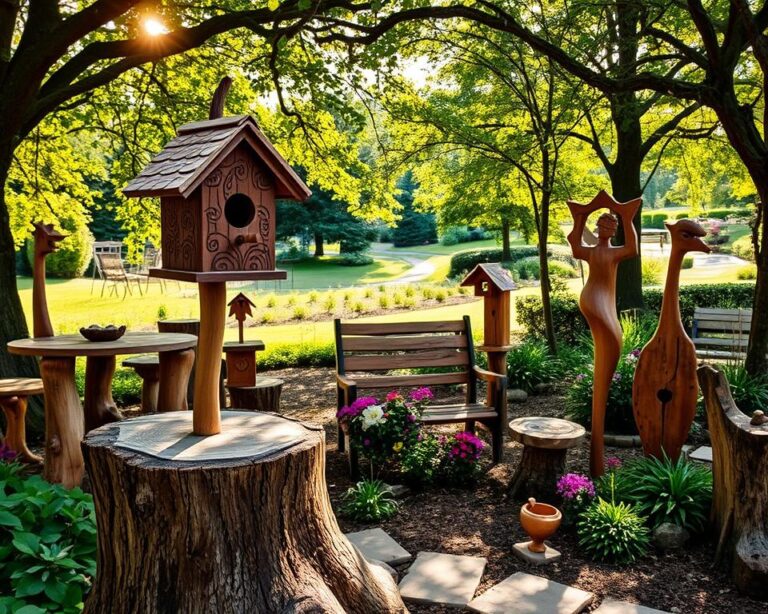
Using Your Lantern for Different Occasions
Your wooden lantern is a beautiful addition to many places. It can make any setting more inviting and stylish. Use it as a centerpiece for dinner or a unique feature in your home. Make sure it matches your decor to stand out.
Indoor Decoration Ideas
- Centerpiece for Dining Tables: Put the lantern in the middle of the table for a fancy look during meals.
- Living Room Decor: Place it on a shelf or mantel for warmth and charm.
- Cozy Reading Nook: Add lanterns to cozy spots with cushions and blankets for a welcoming feel.
Outdoor Uses for Your Lantern
Don’t limit your lantern to indoors. It can also brighten up your garden or patio. Here are some ideas:
- Garden Lighting: Line paths with lanterns for a magical outdoor feel.
- Barbecue Ambiance: Lanterns can make your summer cookouts more enjoyable.
- Holiday Decor: Use lanterns in holiday decor to celebrate special times.
Maintenance Tips for Longevity
To keep your wooden lantern looking great, follow some key maintenance tips. Regular care helps prevent damage and keeps your lantern shining for years. Here are some important tips to remember.
Cleaning and Care of Wooden Lanterns
Keeping your wooden lantern clean is key to its longevity. Here’s how to clean it effectively:
- Use a soft, dry cloth to wipe down the exterior regularly.
- If needed, lightly dampen the cloth with water to remove stubborn dirt.
- For any discoloration, a solution of mild soap and water can help.
- Avoid abrasive cleaners that may scratch the wood surface.
Regular maintenance keeps the wood sealed and looking good. Use wood treatments made for cleaning wooden boxes and lanterns.
Storing Your Lantern When Not in Use
Storing your wooden lantern properly is as important as cleaning. Here are some tips to keep it in good shape:
- Store your lantern in a cool, dry place to prevent moisture damage.
- Wrap the lantern in a soft cloth to avoid scratches during storage.
- If you plan to store it outdoors, ensure it is covered and sheltered from the elements.
By paying attention to cleaning and proper storage, your wooden lantern will stay in great condition. This way, you can enjoy it for years to come.
Conclusion and Encouragement
Now that you’ve made your wooden lantern, it’s time to show it off! Share your DIY project with friends and family. Your lantern might inspire them to try woodworking too.
Looking to get better at woodworking? Try making more wooden boxes or other projects. Woodworking offers endless possibilities. Each project helps you grow as a craftsman and brings joy to your home.
As you finish this guide, take pride in your work. Look forward to making more unique items. Let your creativity guide you, turning your space into a showcase of handmade beauty.