Did you know that about 70% of your woodworking project’s finish quality comes from sanding? This shows how important it is to learn how to sand wood by hand. Whether you’re experienced or new, knowing how to sand by hand can make a big difference in your skills.
Here, you’ll find key woodworking tips to help you get started. Sanding wood by hand makes your surface smooth and defect-free. It also lets you have more control and precision over your work. As you start this craft, learning manual sanding techniques is crucial for that professional look you want.
Understanding the Basics of Woodworking
Woodworking is a craft that lets you turn raw wood into beautiful pieces. This guide will cover essential tools and types of wood. Knowing these basics is key to starting your woodworking journey.
What is Woodworking?
Woodworking is the art of shaping wood into structures, furniture, or art. It can be simple or very detailed. It’s a way to express your creativity.
Essential Tools for Woodworking
Before starting a project, you need to know your tools. Here are some must-haves:
- Saws (hand saws, circular saws, or table saws)
- Chisels (various sizes for different tasks)
- Sanding blocks and sandpaper
- Measuring tools (rulers, squares, and tapes)
- Clamps for holding your pieces together during assembly
Types of Wood You Can Use
Choosing the right wood is crucial for your projects. Hardwoods and softwoods are the main types. Knowing their differences helps you pick the best wood for your needs.
| Type of Wood | Characteristics | Common Uses |
|---|---|---|
| Hardwoods | Dense, durable, and often more expensive | Furniture, cabinetry, flooring |
| Softwoods | Lightweight, easier to work with, and typically less costly | Construction, outdoor projects, and crafts |
The Importance of Sanding in Woodworking
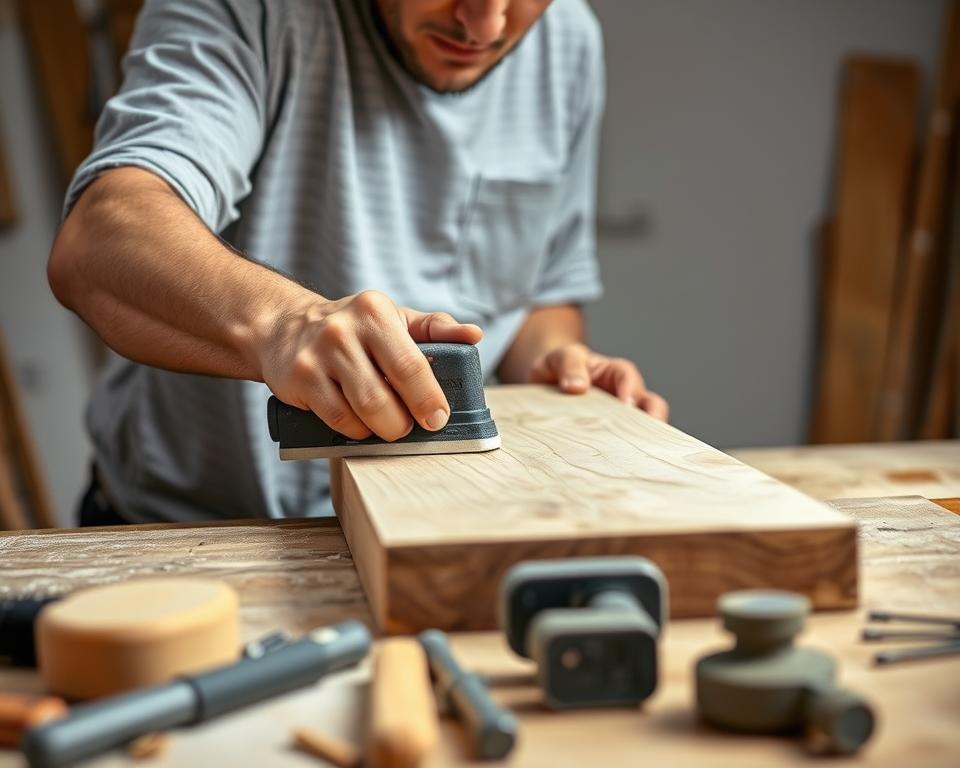
Sanding is key to getting a perfect finish on your woodworking projects. It makes surfaces smooth and ready for more treatments. Hand sanding is great for detailed areas because you have more control.
Benefits of Hand Sanding
Hand sanding has many benefits for achieving top-notch results. Here are some important sanding benefits:
- It lets you control pressure and movement, perfect for detailed areas.
- It’s less likely to damage the wood compared to power sanding.
- You can feel the surface texture, spotting areas needing extra attention.
- It’s ideal for intricate projects needing precision and finesse.
When to Sand Your Wood Projects
Knowing when to sand wood is crucial for the best results. It’s important to fit sanding into your project timeline effectively:
- After shaping your wood to ensure a smooth and even surface.
- Before applying paint or finish to prevent uneven absorption.
- When preparing to join multiple pieces of wood, ensuring seamless connections.
Choosing the Right Sandpaper
It’s key to know about sandpaper grit levels and types for woodworking. The right sandpaper makes a big difference in your project’s finish. Each grit level has its own use, helping you get different textures and finishes.
From shaping to the final touch, knowing when to change grits is crucial. This ensures the best results for your work.
Grit Levels Explained
Sandpaper grit levels show the size of the abrasive particles. They go from coarse to extra fine:
- Coarse grits (40-80): Great for removing big imperfections and shaping wood.
- Medium grits (100-150): Ideal for smoothing surfaces after the first sanding.
- Fine grits (180-220): Best for the last sanding before applying finishes.
- Extra fine grits (240+): Used for polishing and getting a smooth finish.
Start with a coarse grit and move to finer ones as the surface gets smoother. This method helps get the best finish.
Specialized Sandpapers for Different Finishes
Choosing the right sandpaper type affects your project’s outcome. Here are some common types:
- Aluminum oxide: Durable and versatile, good for many uses.
- Silicon carbide: Best for sanding plastic and metal.
- Garnet: Gives a natural finish, great for woodworking.
Each type has special properties that impact its performance. For example, aluminum oxide is great for hand sanding tools. Garnet sandpaper is preferred for its smooth finish. Knowing these differences helps pick the right sandpaper for your projects. For more on rustic finishes and sandpaper tips, check out this guide here.
Preparing Your Workspace
Creating a good woodworking workspace is key for both getting things done and staying safe. A tidy area lets you concentrate on your projects better. Make sure your workbench is set up right and think about how each tool fits into your workflow. This is vital for anyone serious about woodworking.
Setting Up Your Workbench
Your workbench is the core of your woodworking area. First, make sure it’s sturdy and level. This gives you a solid base for all your tasks. Keep tools you use often within reach and store other stuff nearby. This saves time looking for things.
A good workbench should have:
- Adjustable height: For comfortable working.
- Storage options: For tools and materials.
- Clamp spaces: For holding your workpieces.
Adding spots for dust collection or safety gear is a good idea. It makes your workspace more efficient and cleaner.
Safety Precautions While Sanding
Understanding safety is part of preparing for woodworking. Protecting yourself while sanding is crucial. Wear masks, goggles, and ear protection to lower risks. These simple steps can greatly improve your woodworking experience.
When sanding, remember to:
- Ensure proper ventilation to avoid inhaling dust.
- Keep your work area free from clutter.
- Be aware of your body positioning to maintain balance.
By taking these precautions, you can make your woodworking space safer. This lets you focus on your work without worry.
Hand Sanding Techniques
Learning hand sanding techniques is key to a professional finish in woodworking. Using these methods right can boost your sanding skills and project quality. We’ll cover effective methods like circular motion and straight strokes to help you sand better.
The Circular Motion Method
The circular motion method uses smooth, overlapping circles to spread pressure evenly. Keep your hand flat and move at a steady pace. This method prevents divots and ensures a smooth finish.
Adjust your pressure based on the wood’s grain. Regular practice will make you better at this technique.
using straight strokes effectively>
Straight strokes are another great method. Move the sandpaper along the wood’s grain. Keep the pressure even to avoid scratches. This method works well on big, flat areas.
Getting good at these sanding skills will make your projects look better.
Finishing Touches: How to Sand Edges
Woodworking details require a smooth edge finish for a professional look. Paying close attention to edges, especially corners, is key. Here are some tips for sanding outside and inside corners.
Sanding Outside Corners
Sanding outside corners can be challenging. Begin with 120 grit sandpaper to smooth out rough spots. Use a sanding block to control the sandpaper better. Apply gentle pressure and move in circular motions to keep the corner rounded.
Sanding Inside Corners
Inside corners need a different approach. Use a narrow sandpaper or sanding sponge to fit into tight spaces. Choose 220 grit sandpaper for a finer finish. Sand back and forth carefully to achieve a smooth surface.

Common Sanding Mistakes to Avoid
When you start woodworking, learning to sand well is key for a smooth finish. Knowing common sanding mistakes can really help your projects. Two big mistakes to watch out for are over-sanding and not following the wood grain direction.
Over-Sanding Your Wood
One major mistake is over-sanding your wood. This can cause damage, like making the surface too smooth or changing your project’s shape. It can also make the wood look dull instead of shiny, losing its natural beauty.
Ignoring Grain Direction
It’s also important to sand in the wood grain direction. Sanding against the grain can leave ugly marks. Always sand with the grain to get the best finish and keep your wood looking great.
Enhancing Your Results with Finishes
After sanding your woodworking project, it’s time to apply a finish. This step protects the wood and makes it look better. There are many wood finishes to choose from, each with its own look and benefits. Knowing how to pick and use these finishes is key to getting great results.
Common Types of Wood Finishes
Wood finishes vary, letting you customize based on look and protection. Here are some common ones:
- Oils: Finishes like tung oil and linseed oil feed the wood and highlight its grain.
- Stains: Stains come in many colors, adding depth while showing the wood grain.
- Sealants: Varnishes or polyurethanes create a strong barrier against moisture and wear.
How to Apply Wood Finish After Sanding
Applying finishes right can greatly improve your project’s look. Here’s how to do it well:
- Make sure the surface is clean and free of dust after sanding.
- Pick the right finish for your project.
- Apply the finish with a brush or cloth, following the wood grain.
- Let each coat dry fully, as the maker’s instructions say.
- Lightly sand between coats with fine-grit sandpaper for a smooth finish.

Maintenance Tips for Your Sanding Tools
Keeping your sanding tools in good shape is key to their performance. By taking care of your sanding tools, you ensure they work well for your projects. This part will show you how to clean sandpaper and store sanding tools right to make them last longer.
Cleaning Your Sandpaper
Cleaning your sandpaper regularly can make it last longer. Dust and resin can make it less effective, leading to poor results. To clean it, use a rubber eraser or a sandpaper cleaning stick. Rub gently to get rid of dirt and keep the grit sharp.
Storing Sanding Tools Properly
Storing your tools right is important for their upkeep. Keep them in a dry place to avoid rust and damage. Use a toolbox or racks to organize them. This protects them and makes them easy to find when you need them.
By following these tips, you can make your sanding tools last longer and work better. Taking care of your tools means better woodworking experiences in the future.
Inspiring Woodworking Projects to Try
As you dive into woodworking, it’s key to test your skills. Try out inspiring woodworking projects. Whether you’re a beginner or ready for a challenge, there’s something for you.
Simple Projects for Beginners
Beginners can start with simple projects like a wooden candle holder or a basic bookshelf. These projects help you learn measuring, cutting, and sanding. You can find a guide to making wooden candle holders here.
Doing these projects boosts your confidence and prepares you for more. They’re a great way to start your woodworking journey.
Intermediate Projects to Challenge Your Skills
When you’re ready, move on to more complex projects. Try making a stylish coffee table or a storage bench. These projects will improve your skills and show off your creativity.
They require precision and advanced techniques. Plus, they make great pieces for your home, showing off your hard work and skill.